Micro preschool curriculum review week 1

Our first week of preschool is complete! Here is what we accomplished! Our overarching themes for this week were:

Overcoming fear/new experiences/being welcoming

Math: Circles and squares, 1-5

Reading/writing: the letter Aa and Bb

Art/science: primary colors mixing to secondary colors

Yoga:

9:00-9:30

We start our days with yoga to immediately capture the attention of our preschoolers so they get their bodies moving and brains activated. kiddos get so excited when they get into class that sometimes it can be a difficult transition to listening/learning/doing, and movement with music is the perfect transition helper.

On day 1 we read Meddy Teddy, to give an introduction to the yoga poses and follow the journey of a cute little bear who wakes up early in the morning and goes on an adventure and ends up doing yoga poses.

On days 2 and 3 we built upon our Meddy Teddy poses (referring back to the story) and listened to Kira Willey’s Dance for the Sun and The Shimmy (which was absolutely hysterical for the littles). Kira Willey’s entire album is a work of pure genius for young movers. The kids got it immediately, and when the song came on by accident later in the day they dropped what they were doing, ran out to the floor, and started doing it on their own (amazing). I can’t wait to work our way through the entire album. Found myself humming it throughout the week, and didn’t even mind.

Story-time (overcoming fear and being kind):

9:30-9:40

Immediately after yoga i read a story relating to this week’s theme, and this week we read Don’t Worry Little Crab, Have You Filled A Bucket Today? and The Kindness Book. For this first week we wanted to put a strong emphasis on learning kindness, empathy, and overcoming big fears. Don’t Worry Little Crab is one of my all time favorite children’s book, has amazing illustrations, and a simple story that is immediately relatable (small crab is scared of the ocean, big crab helps him overcome fears while not dismissing his fears). I love that it does not say ‘mama crab’ or ‘daddy crab’ but rather ‘Very Big Crab’ and “Little Crab”.

Have You Filled a Bucket Today is probably the most important social/emotional development book I’ve ever read to a child, and should be a staple in everyone’s home! We relate to it all day, every day, even with my older children. The concept: everyone has an invisible bucket that carries their good feelings and love. When your feelings get hurt, your bucket becomes less full. If you burst into tears and cry, it means your bucket has completely spilled. We can fill up our buckets by saying nice things and being kind to one another. When you are kind to someone else, it fills up not only their bucket, but also yours! When you say mean things, you are dipping from someone else’s bucket. The concept is so genius it is immediately absorbed by kids even as young as 3. ‘My bucket is spilling!” is something my daughter says when she cries now, and we know how to fix it- by filling the bucket back up! It reassures her that this feeling won’t last, and is fixable with kindness and support. You can also fill up your own bucket, by saying and doing kind things for yourself, which I especially love. Instead of saying something like “thats not nice! you’re not being nice! be nicer!” children understand the ‘why’ we should be kind, and the ‘how’ we should be kind. This is the most important children’s book I have on my shelf, and we will return to it whenever needed.

The Kindness book is the perfect book to read after Have You Filled a Bucket Today, because it details ways in which you can be kind (aka, ways in which you can fill someone’s bucket). This was our read on day 3, and we tried to do as many kindness gestures as we could throughout the day to fill everyone’s bucket up!


Pre-Reading/Writing

9:40-10:00

We are working on the letters Aa and Bb this week! Read the AB book in the alphabet series of BOB books to start, then each kiddo got to make their very own 2 part epoxy alphabet letter! They each get to pick out their favorite glitter colors, help mix the epoxy, and pour it into the mold. It cures for 24 hours then I place a magnet on the back, for their very own personalized fridge magnets! It really makes letters come to life, and we say their ‘sounds’ as we pour. Each student has 1 day of this, so the repetition of pouring the glitter epoxy into the letter molds is great to cement these letters/sounds into their brains.

IMG_4992.jpg

We also read just the section of the A and B of the following books. As each week progresses, we will start at the beginning (for review) and read up until that particular week’s letters. this way, we are constantly reviewing, as well as cementing in the new material!

We start with this ABC3D book by Marion Bataille because it is a literal work of pop up art. Each letter comes off the page in a different 3-D way. I’m a huge fan of popup books - my kids get one every year on christmas eve so we have a giant collection. They make reading absolutely MAGICAL and exciting. the letters are formed in all kinds of ways, so it really helps open up the young mind to ‘seeing’ letters in all kinds of ways.

Bucket filling A to Z helps me re-inforce what bucket filling is each and every day. in this bucket filling book, it gives examples of how to be a bucket filler for each letter. for example, A is ‘Ask how you can help’ (may I help you carry that heavy bag? May I help clean the house? ) Learning letters while reinforcing this key emotional/social development each week is so helpful.

We read up to this weeks’ letters, because who doesn’t love Dr. Seuss rhyming! It is also is a great example of ‘what words begin with’ to tie in letter shapes, their sounds, and the words they comprise.

Invitation to Play (reading/writing/math)

10:00-11:45

At 10 we jump into our reggio inspired play stations! These stations are on theme for the week, are sensory inspired, always have a strong emphasis on math/writing concepts snuck in, but allow for whatever they wish to do! In our play room we set up tables with different stations so the kids can explore their own interests and learn concepts along the way.

This is what we worked on this week:

Writing numbers 1-5 and letters A and B, and counting/subtracting/dividing up snacks!

IMG_5001.jpg
IMG_4972.JPG

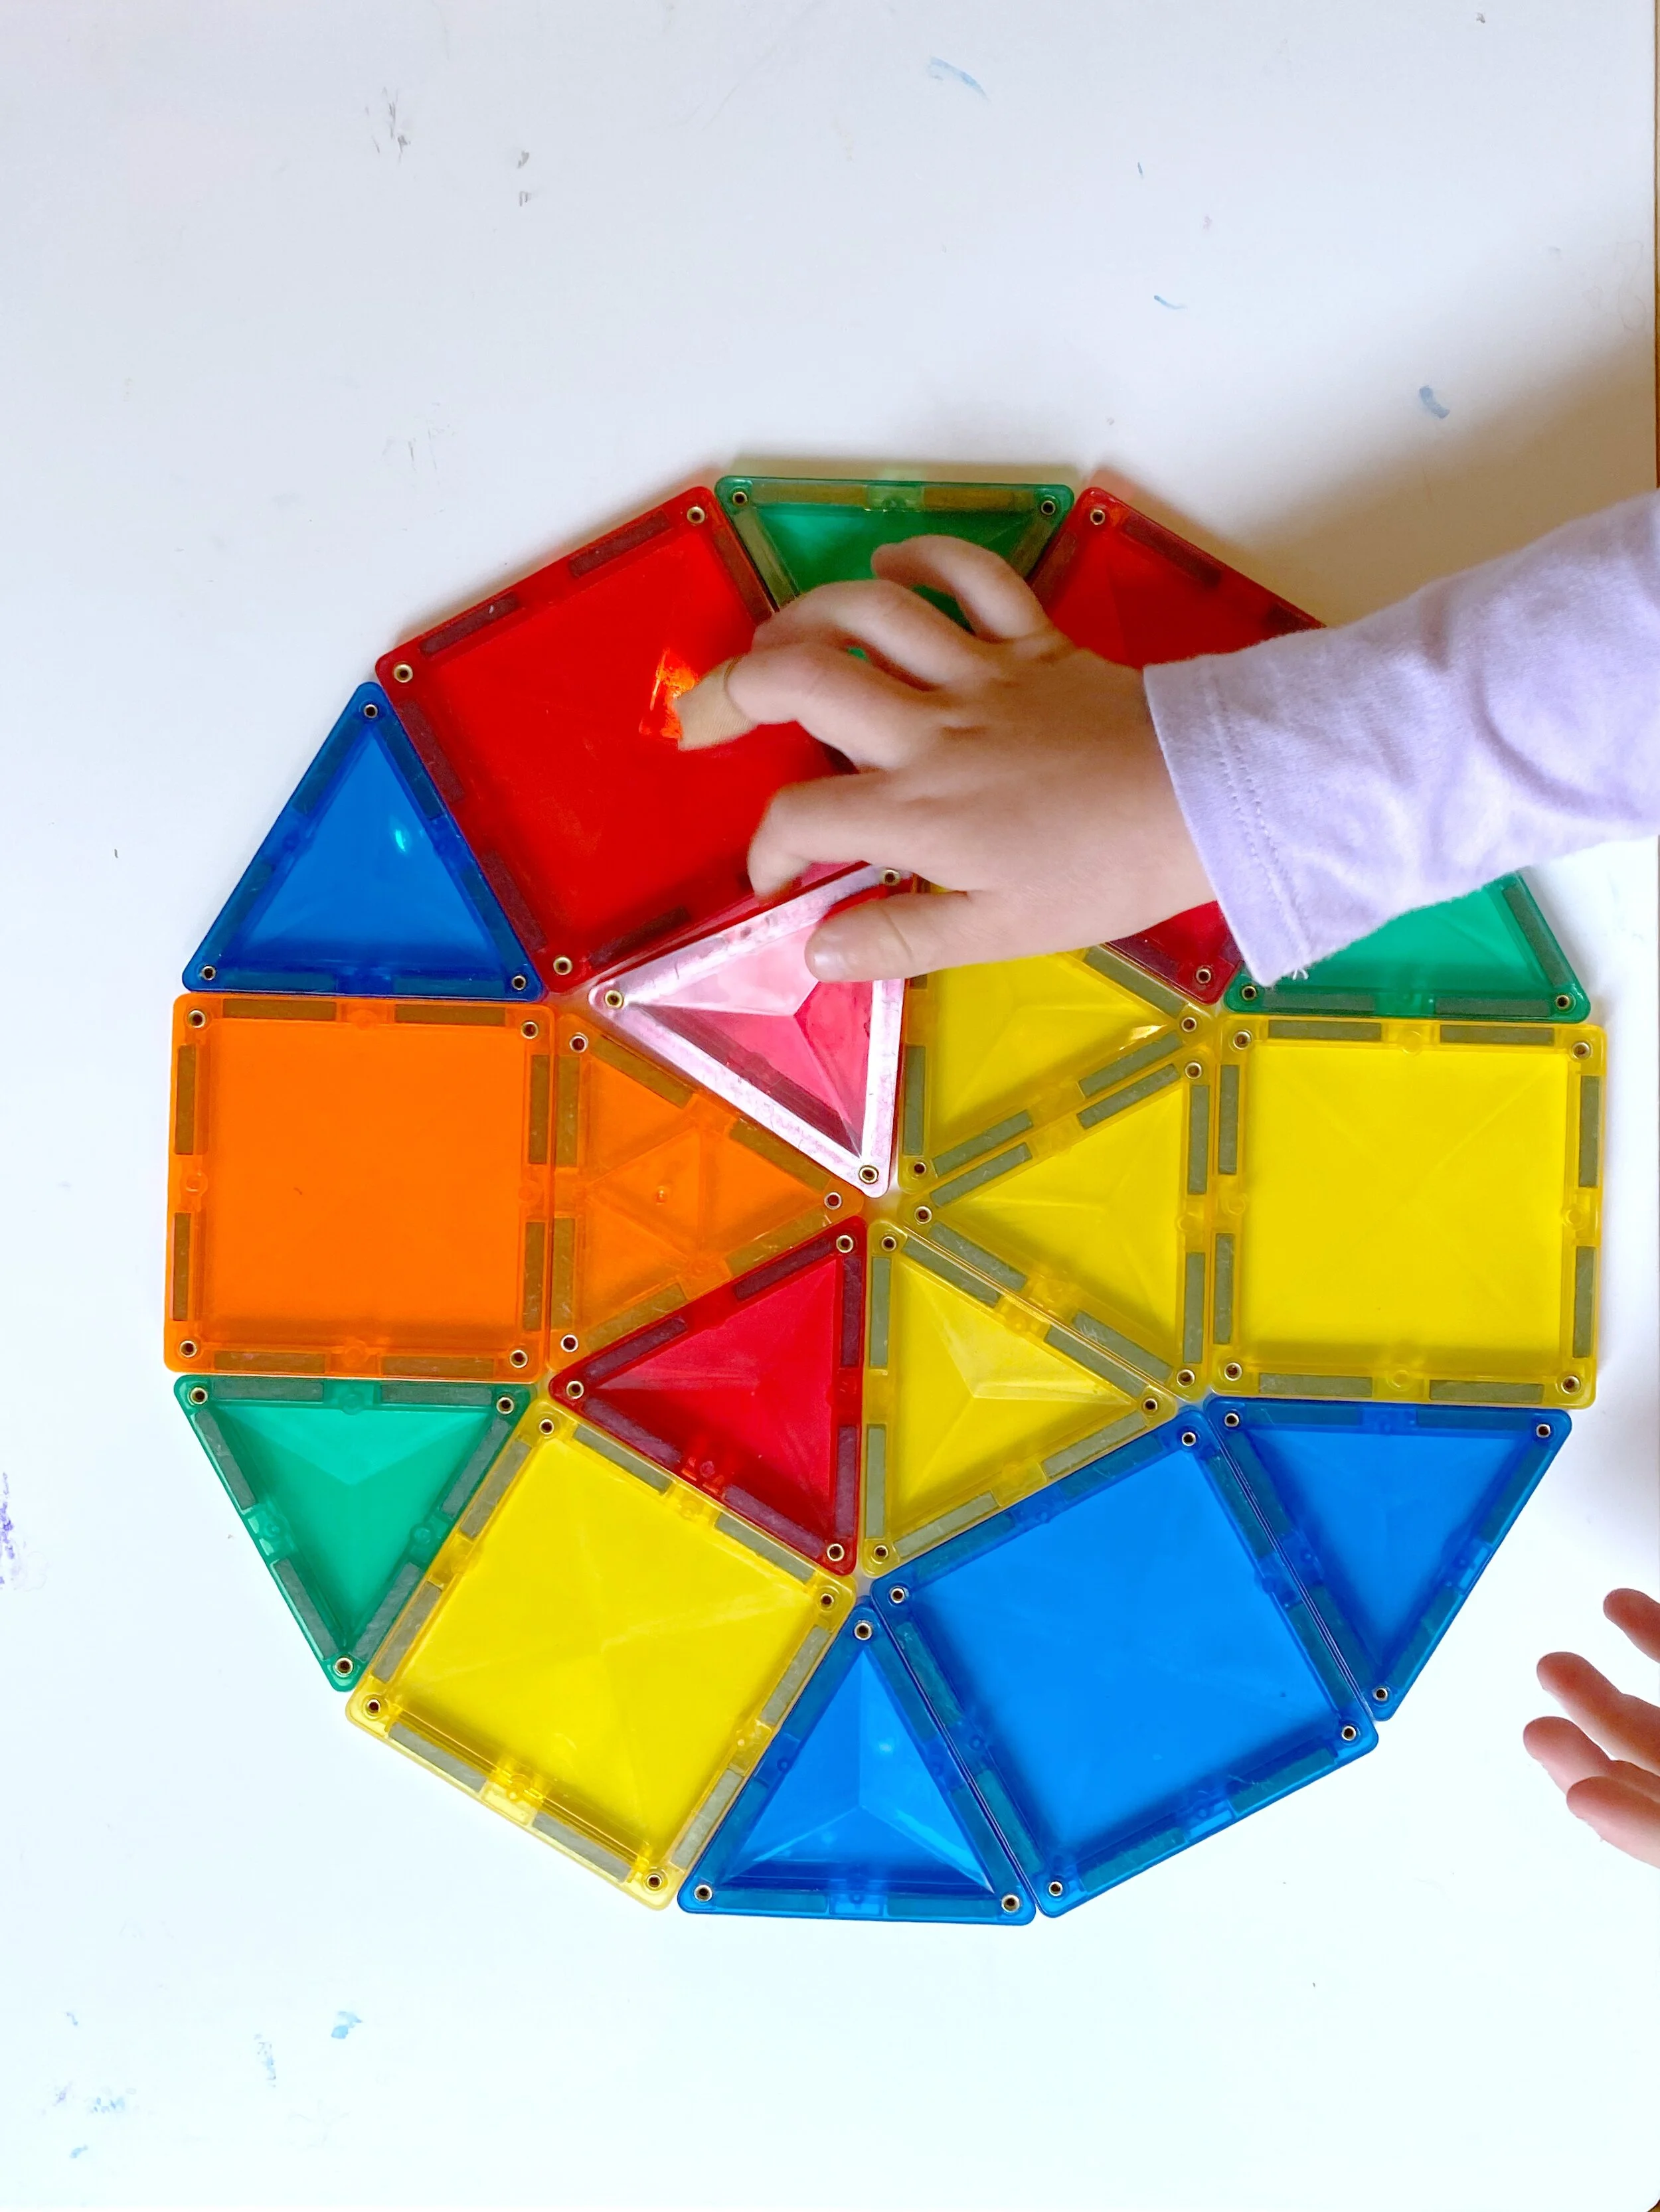
Tying in our circle and square theme with geometry- I challenged the kids to figure out how to make a circle with Connectix if we only have squares and triangles! I could not believe that they came up with the circle ideas! We only had enough triangle Connectix to create half a circle… so they brought it over to the mirror to make a full circle! and then they figured out how to combine both squares and triangles to make a circle - consider my mind blown. This was 100% child led, I didn’t help at all!

IMG_4988.JPG
IMG_4990.JPG

i also challenged them to make a square, and count all the squares they could count within this giant square! (spoiler: it was more squares than they could even count up to on their own!)

Connetix are the best of the magnet tiles. they have super strong magnets that are manufactured to be ultra safe. The plastic is scratch resistant and BPA and Phthalate free, and beveled to be ultra strong- so even when kids purposefully crash them down they withstand nearly anything. we have the full 100 piece set and also the ‘motion’ pack which includes car bases. if I had all the money i would keep adding to our collection and get every single expansion pack!

IMG_4991.JPG
IMG_5002.JPG

and we worked on fractions, by dividing our play dough up evenly among the students, and then mixing them (tying in our art theme for the week- primary colors mixing to secondary colors!)

At the end of the week we did orbeez water beads with measuring cups to work on volume and fractions in our light tables! our scissor grabbers really help with fine motor skills and the kids loose their minds because water beads are the actual best. Even my 5th grader jumped in because… how can you not?

Water beads trick: use warm water to help with the fall chill and squirt a bit of hand sanitizer into them so kids get clean while playing! While you technically can dehydrate them and save them for later, we generally play with them for a few days until they get kind of squished (or the kids loose interest) and then mix them into our flower garden beds. Water beads are bio degradable and were invented for agricultural use for soil to help maintain moisture. Our water-hungry kids flower beds are the PERFECT place for our used water beads!

RNI-Films-IMG-42722AE8-4250-4008-A40A-DF6F6E04B05D.JPG
IMG_4971.JPG

The way water beads look through our light table is AMAZING- absolutely mesmerizing. I’m so happy with my DIY ikea light tables! best quarantine project ever! promise to do a tutorial soon!


outdoor stewardship and play

11:00-12:30

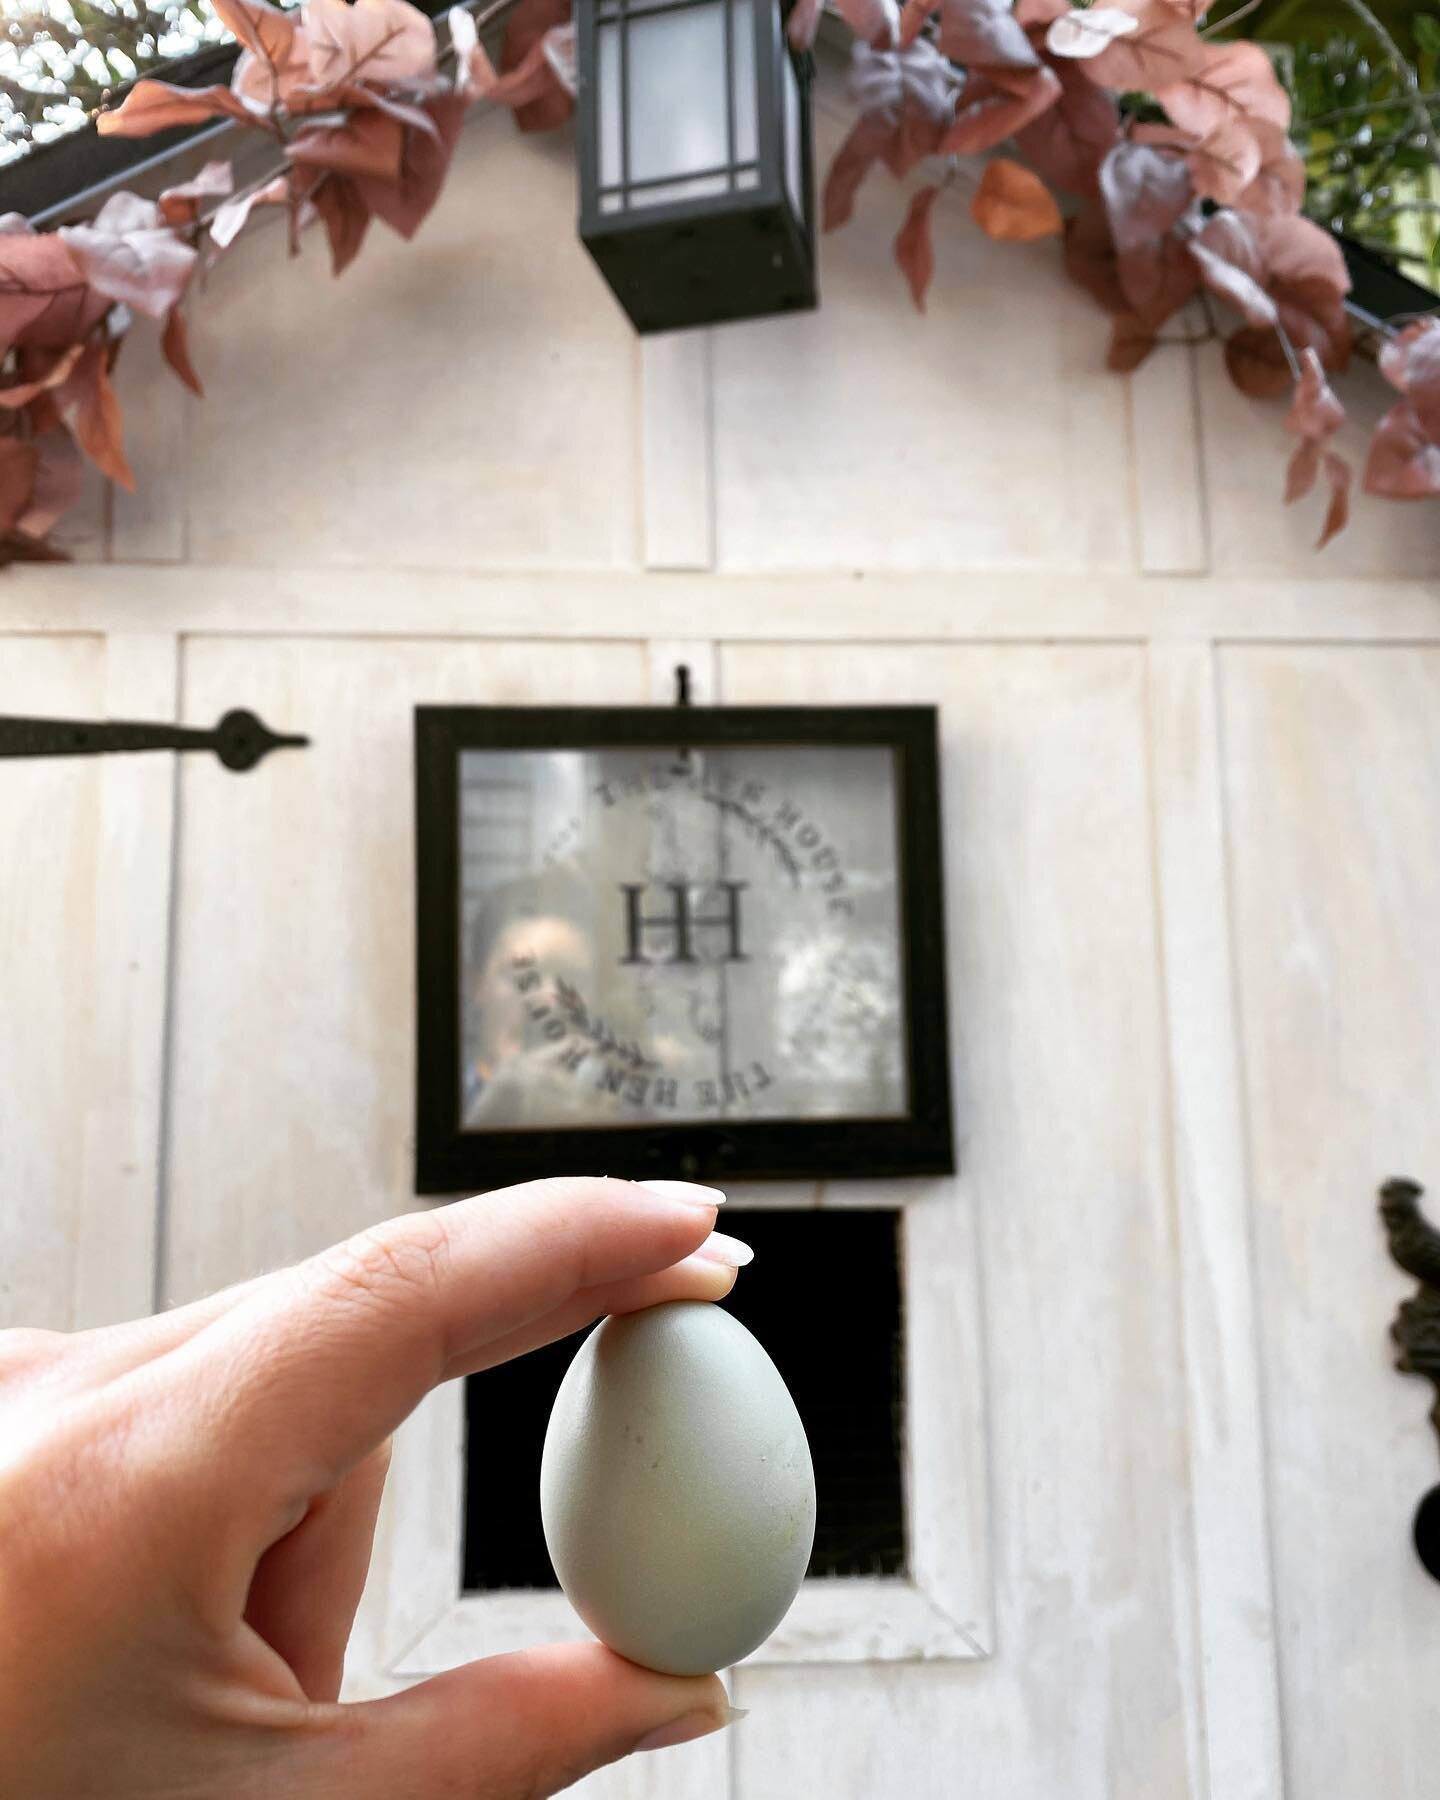
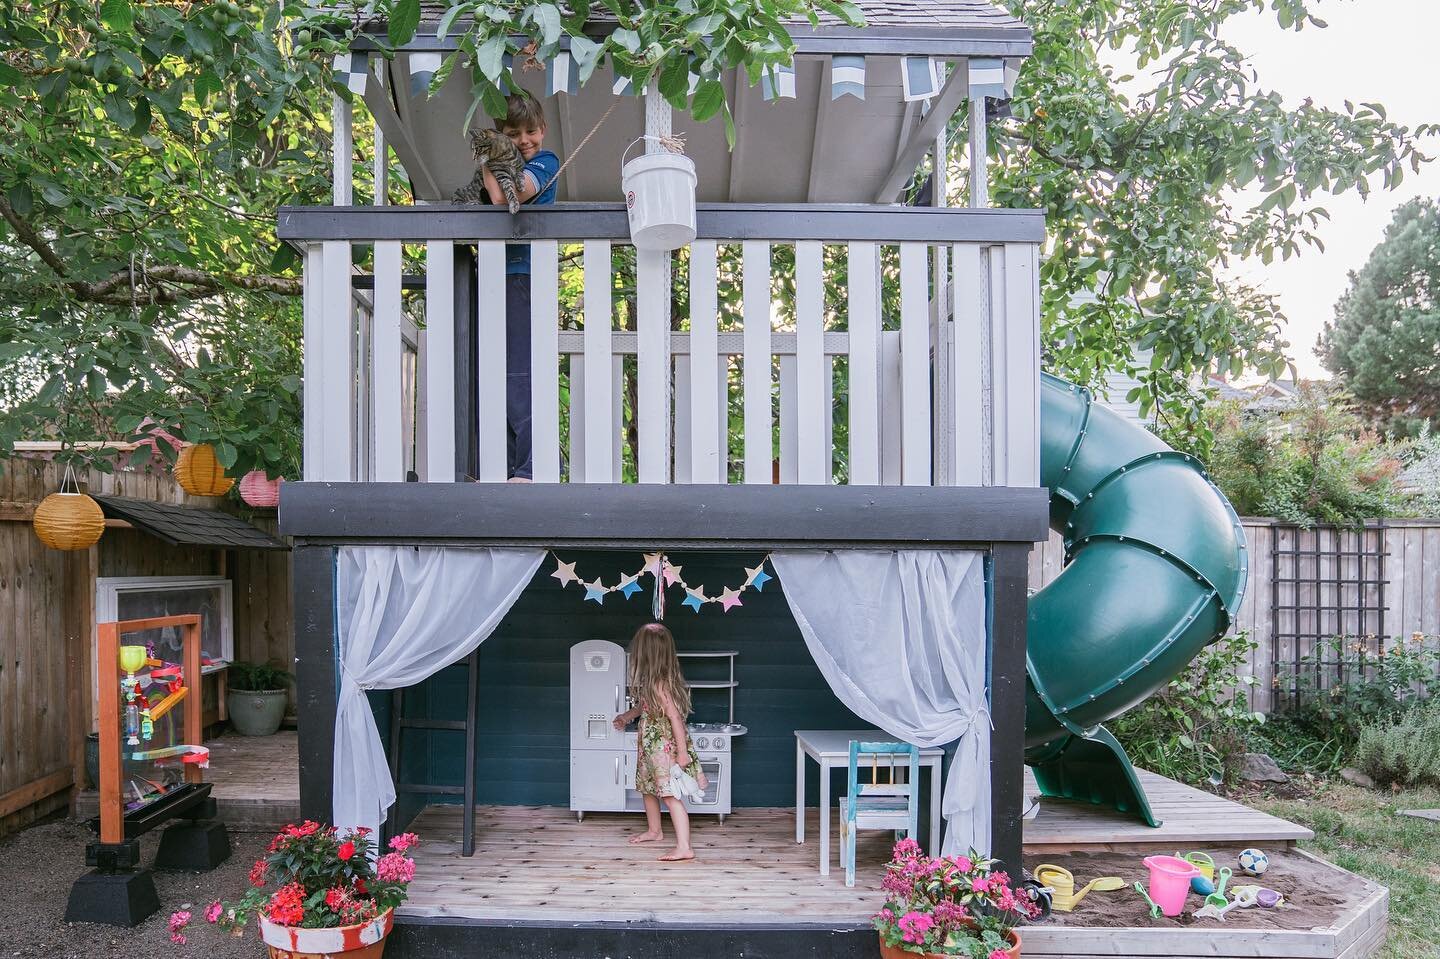
We transition at 11 outside to our urban farm! We always start out with chores- checking on the chickens, looking for eggs, feeding the chickens, planting/harvesting in the vegetable garden, feeding the fish, sweeping the water for debris, sweeping out the playhouse. While we live on the west coast now, both my husband and myself are from the midwest and our kids have been doing ‘difficult’ chores since they could walk. the expectation is we work hard for the things we love, so we can continue to enjoy them! It doesn’t matter how well a child does his/her chores, it just matters that they practice taking care of their environment, to help build empathy and a sense of responsibility for the things we have. Just like Mary Poppins, we make our stewardship FUN (who doesn’t want to find a chicken egg?!)

IMG_4985.JPG
IMG_4982.JPG

Once our responsibilities are completed kids get to have an entire hour of unstructured free play!

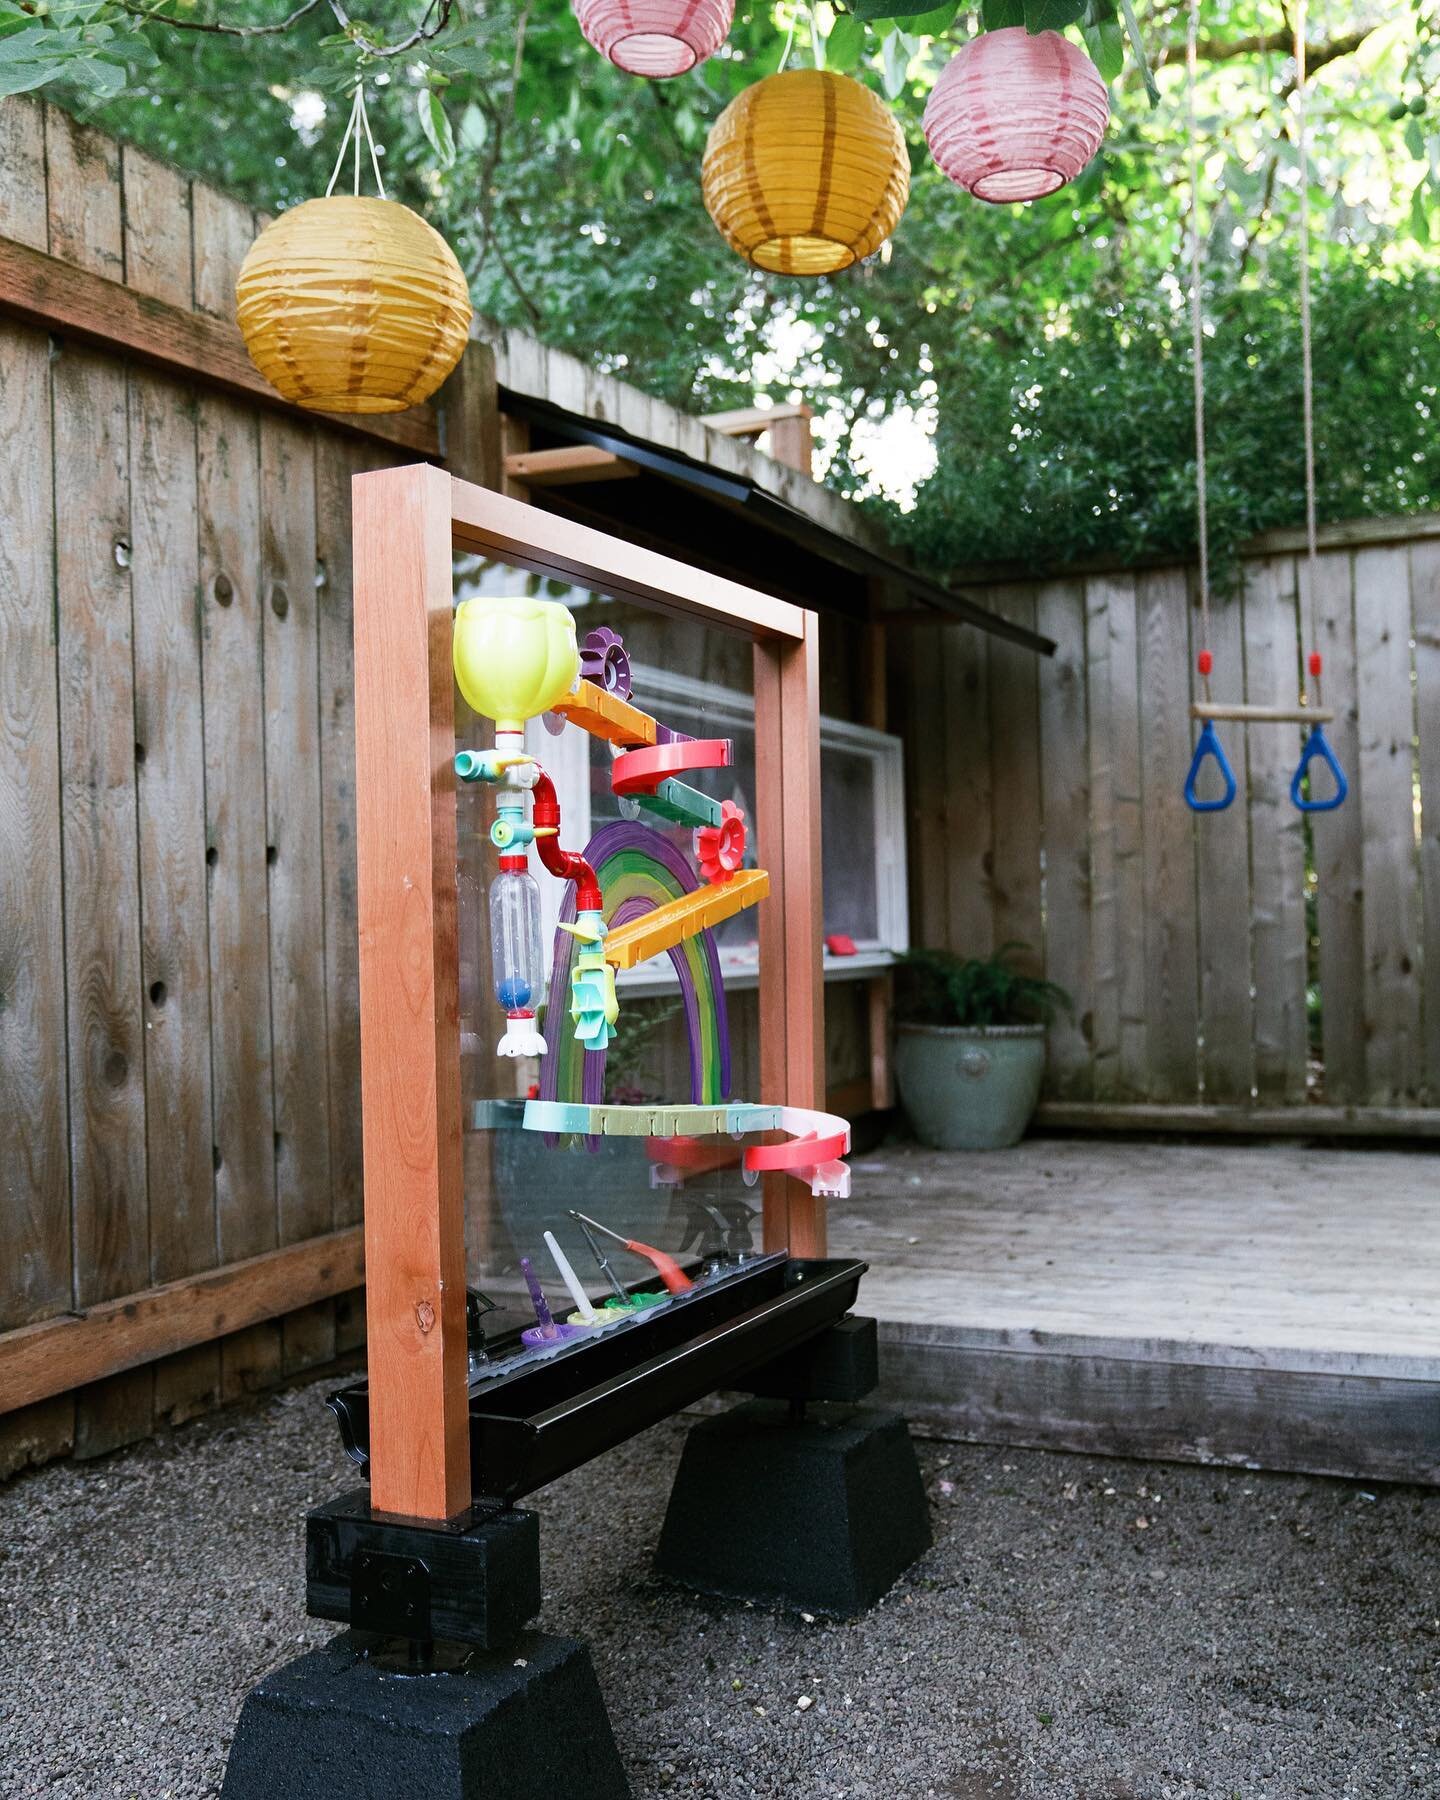
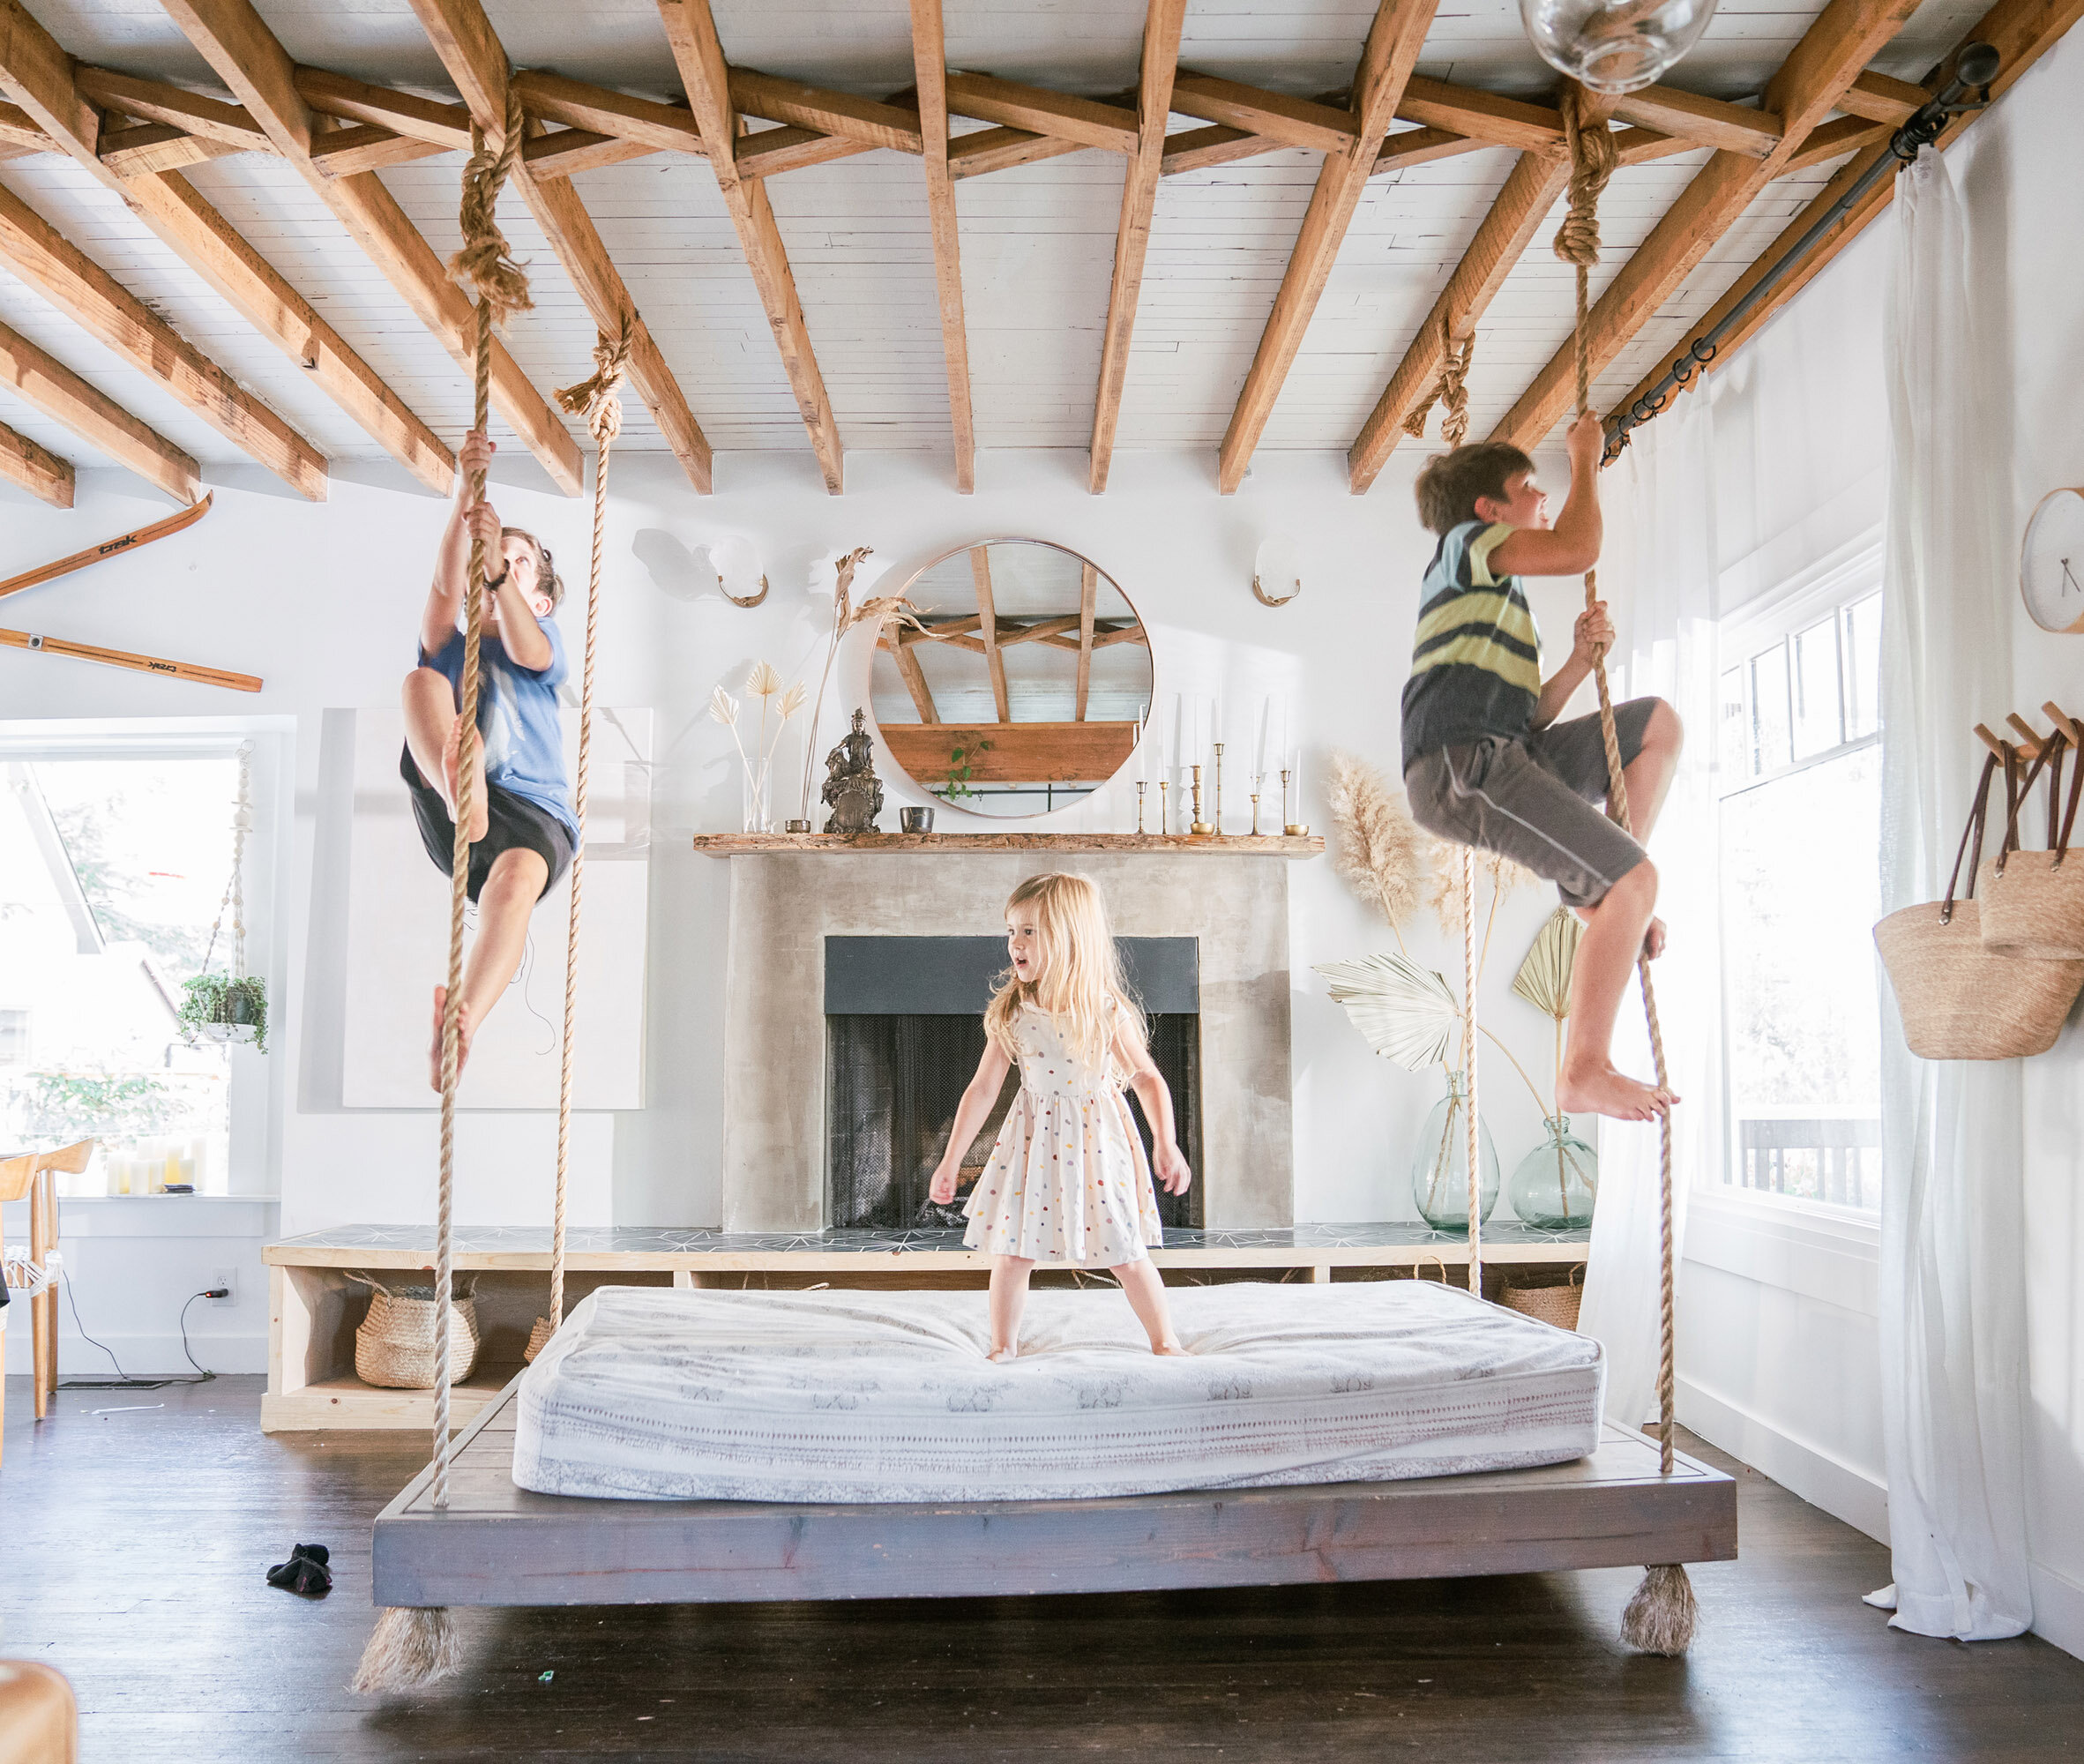
There are sensory stations like our sandbox (always covered when not in use) and water wall. There is imaginary play in our playhouse and creative outlets (like our painting wall, easel, and giant chalkboard). Our physical processing outlets like rocking, swinging, bouncing, and upside-down play that are important for vestibular stimulation and brain development in young children. Finally, we have ample open-ended toys kids can use to build obstacle courses, structures, or any kind of imaginary world they want.

IMG_4968.JPG

Lunch and quiet-time meditation

12:30-1:30

If it’s nice outside we have a picnic lunch to soak up more of that vitamin D! otherwise, we come inside to get warmed up, wash our hands, and get snuggled in for our quiet-time meditation. Each child has a space on the floor to relax and be covered with a weighted blanket.

I start by pulling one card from our deck of 50 mindfulness activities, and have the children work through it with me.

I then play a 10 minute meditation from the app Mindfulness for Children. I am consistently impressed with the meditations, and how well the kids listen/stay quiet.This quiettime has been absolutely instrumental to their mental well-being … after a hard outdoor play for an hour and a half and big learning in the morning, they really need the calorie boost from lunch and a rest for a mental (and physical) reset so our afternoons are productive. This mama also needs a moment to prepare our afternoon snack, our afternoon art project, and our science experiments (one woman show here!).

French

1:30-2:00

We gently work back into brain-mode with French. Our french is via my favorite subscription box- One Third Stories. Our book starts out in english, but by the end, is one-third in French! Children learn the words through context clues, and sentences like “I love your shoes!” “Thanks! my mom bought my chausseurs for me yesterday!” Our books come with activities and are absolutely perfect for preschool and up. If you want to order your own subscription box, just know that it is coming from the UK so shipping times may be delayed due to covid. we have a stockpile of the next three months already lined up, so luckily we won’t be running out!

Our One Third Story this month is about a dinosaur looking for just the right pair of shoes! which is great, because I have a daughter who is borderline obsessed with dinos. The writing is great, the illustrations are fantastic, and the subject matter happens to be on subjects that are universal kid favorites. I give it five stars!

We also watch a 15 minute muzzy french immersion show, which is exclusively in french but easy enough for children to pick up on what they are saying through context clues. At the end of the show we do the activities to help drive home what the sentences are. this show is re-watched at the end of the week to cement those phrases so they really understand it. This gives them the necessary native tongue accent-I’m decent at french but nowhere near a native accent, so we absolutely need some native speaker audio to round out a proper foreign language education.

My older boys love to mentor the kids during this time as well- they have been in french immersion for 8 years so it’s great for them to help littles, and for the littles to have a big kid to look up to.

Science

2:00-2:30

This week our science was about the properties of water, and the science of color mixing!

We started out with a walking water experiment- to test what would happen if we connected cups of primary colored water with strips of paper towel. The kids made their hypothesis, and I transcribed their words on their Scientific Method sheets. Then, they drew the experiment to record the process. Finally, I recorded their conclusions by transcribing their words (always adorable). We learned about how water can move against gravity because of capillary action, and that is also how plants get water up from their roots to their leaves and flowers. we learned that when primary colors mix, they make secondary colors- purple, green, and orange. We learned that all these colors together form a color wheel, or a rainbow!

IMG_4995.JPG
IMG_4998.JPG
IMG_4975.JPG

The next day, we built upon that knowledge of color mixing to learn more about the properties of water. I froze ice cubes with food coloring and we asked what would happen if we put two different primary colored ice cups in the same bag together, and hung it up in a sunny window? The kids hypothesized they would melt…. but didn’t quite guess they would melt into a TOTALLY NEW COLOR until they started watching it melt. We talked about how the colors can never be UNmixed once they are mixed together- they are a totally new color. BUT, we could always refreeze the water (over and over) and make ice cubes out of our secondary colors.

IMG_5027.jpg
IMG_4978.JPG
IMG_4979.JPG

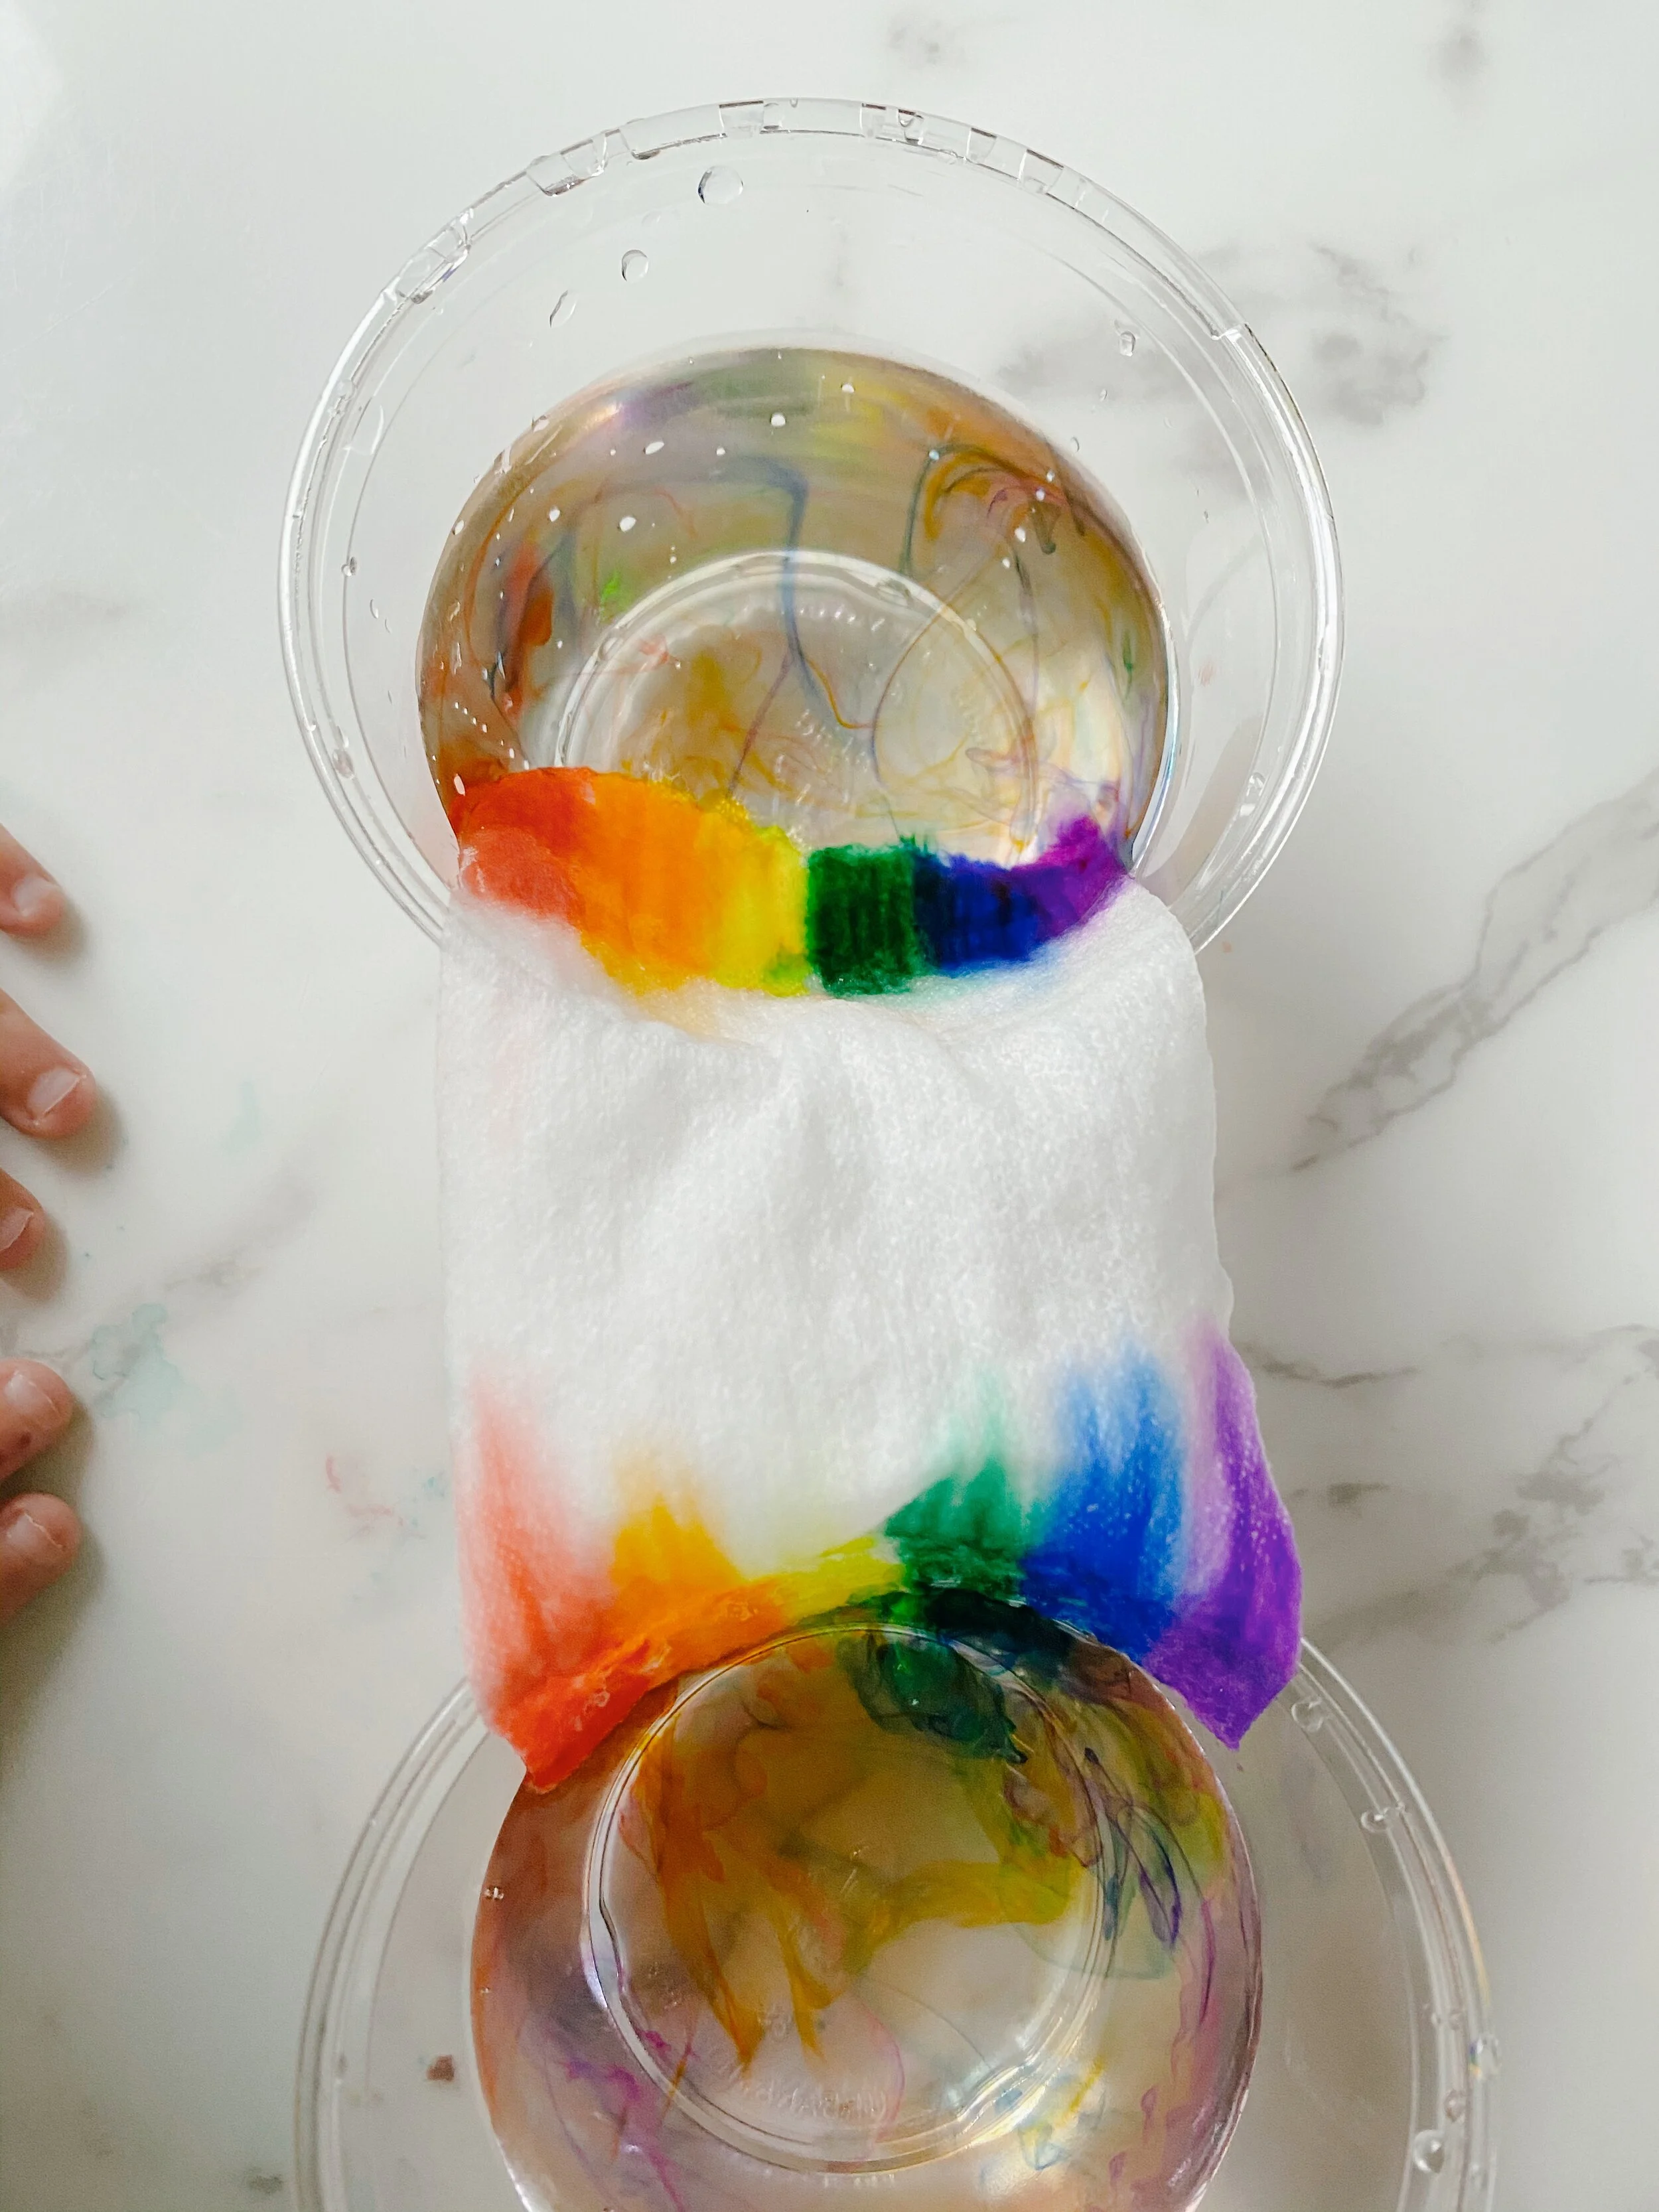
This next experiment- Grow a Rainbow - is my favorite because it involves just washable markers (vs permanent food coloring!) and further re-enforces capillary action. It happens in just 30 seconds, so kids can really watch their rainbow ‘grow’. note: make sure to not completely submerge the colored part in water- or the rainbow won’t grow! but, this can be a good learning moment too- why do you think the rainbow didn’t grow on that side?

IMG_5041.JPG
IMG_5042.JPG
IMG_5043.JPG

Dance /Music

2:30-3:00

This week in dance we did ballet and jazz! In jazz we learned that we can move parts of our body just by themselves (head, shoulders, hips) or we can move them all together at the same time! we learned plié, first position, and tendu, and relevé walks across the floor in ballet. In music we learned quarter notes and our first song: Namaste

Art/Art History

3:30-4:30

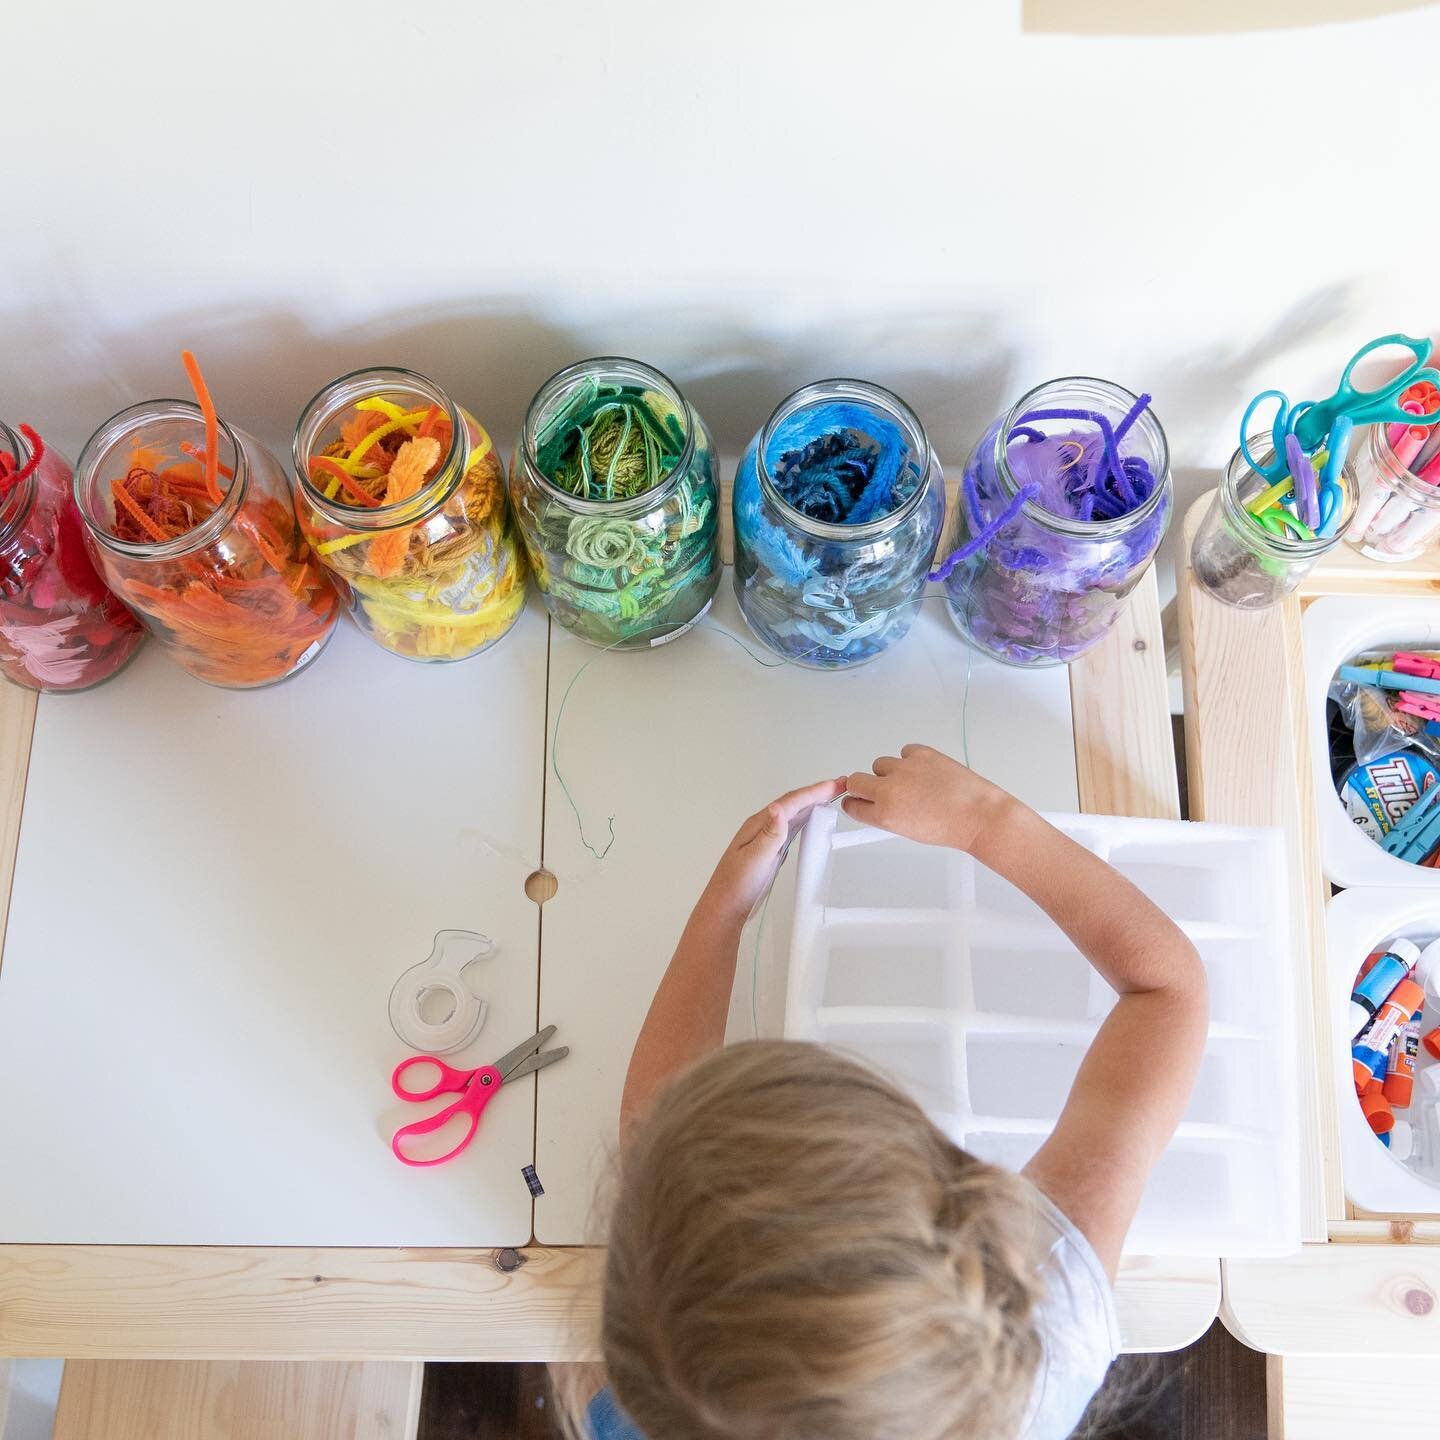
Each week we will be learning about one of the elements of art (color, line, value, shape, form, texture, space) and the principles of design (balance, unity, variety, emphasis, movement, pattern, proportion). On our first day of art, we experimented with… you guessed it… color mixing!

This super fun sensory experiment involves dividing a piece of paper into 6 sections, and placing a glob of red, blue, and yellow paint into 3 sections. Place in a plastic bag and let the kids smoosh them all around! They will end up with the best tie dye style color wheel! This would be great for even the tiniest of artists- as it involves no mess, but all the fun!

While the kids smooshed, I read the book Mixed ,A Colorful Story by Agree Chung, about three different colors who got in a disagreement and wanted to live in separate areas of the city- not liking one another. One day, blue and yellow decided they liked each other, fell in love, and had a baby named…. GREEN! Soon other colors want to mix!

It’s such an amazing story about celebrating differences, loving one another and the amazing things we can create when we integrate and honor our differences. This project is the perfect lead in to the next day’s art project and art history lesson about Piet Mondrian, so I got a head start and showed the kids his artwork and read a little bit about him so we’d be ready to go the following day!

IMG_4993.JPG

Our Piet Mondrian project turned out beautifully! Piet Mondrian was a Dutch painter, and one of my favorites for people who don’t have a real appreciation for modern art because they don’t understand it. You can see the evolution of his work from the realist style, increasing into it’s broken down forms, until finally, its pure elemental forms of fields of solid primary color. When you look at his work as a whole body evolution, you can even see the influences of his love of jazz and the influences of new york when he moved there. it’s amazing to see how life imitates art and art imitates life.

Not only doI appreciate Piet Mondrian as an example of modern art, but learning about his work and emulating it is SUCH a great lesson for mini artists! We get to return to our earlier lessons in geometry about shapes inside shapes, return to our shape of the week (the square!), and review our primary colors red, blue, and yellow. We also work on filling up a space with color which is harder than you might think for a preschooler! We take for granted that we can see empty white space and fill it up, but a preschooler has a difficult time covering an entire space with color. If that isn’t a challenge- it’s the opposite…. covering too many spaces with color.

So while this art looks easy, it’s actually very challenging for a young artist!

IMG_4980.JPG
IMG_4981.JPG
IMG_5028.jpeg

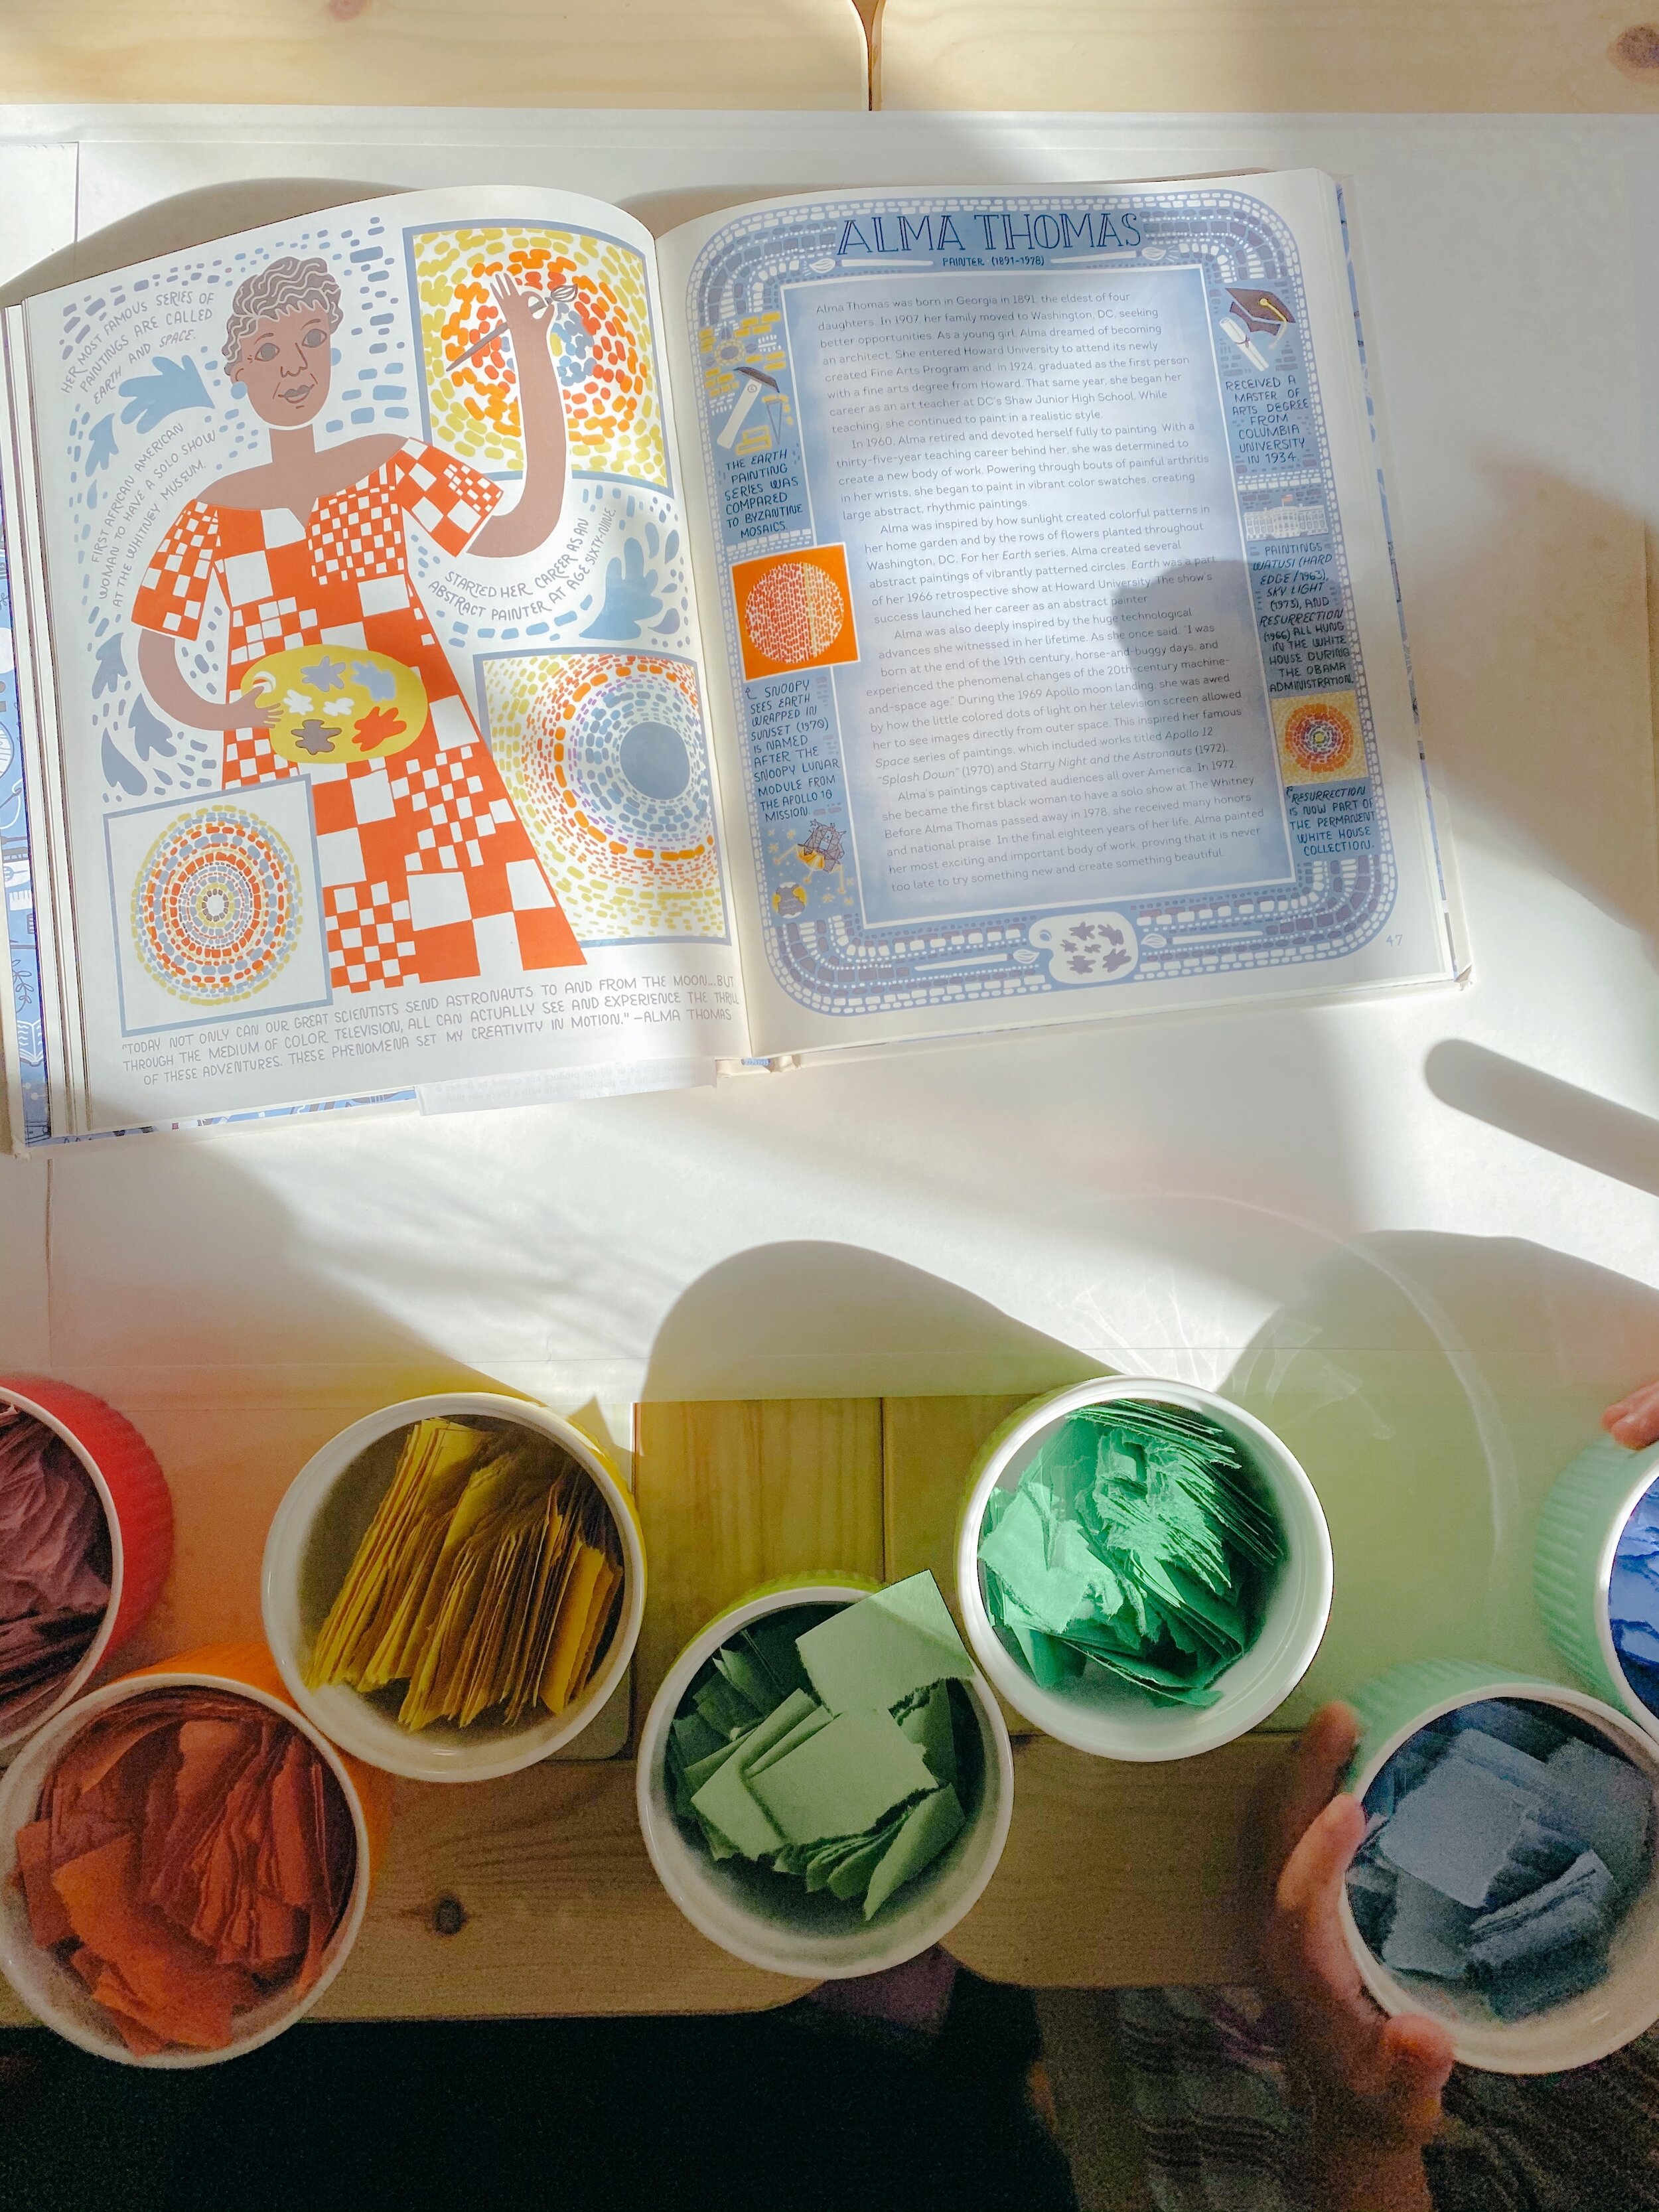
What I’m really excited about teaching this year is female art history! Did you know that only 13% of gallery represented artists are women? Of the hundred most expensive works of art ever sold- none of them are by women. Women, on average, sell their pieces at DRASTICALLY lower price points than men. It’s not that there are less women artists- there are actually more female art students than male. The drop-off happens at the gallery level, where women are drastically underrepresented. So, while I will always teach about all great art, I’m going to put extra emphasis on some of my favorite female artists until those stats are equal.

I wore my Art Girl Rising shirt while I taught our students about Alma Thomas! Key takeaways: she was the first fine art student to graduate from Howard University and the first African American woman to earn an art degree. She was an art teacher for a long long time, but once she retired she began to make art she loved. She had grown up in the time of horses and buggies, but saw cars come to fruition, and even the space race to the moon. This inspired an entire series of work dealing with space (which is what we emulated). In her old age she suffered from arthritis, and her wrists and hands hurt so badly that she created paintings with simple blocks and fields of color. She had her first solo show at the Whitney (the very first African American woman to have a solo show there) AT THE AGE OF 81!!!!! EIGHTY ONE!!!!!

Alma thomas teaches us that even if no one that looks like you has ever done something, YOU CAN BE THE FIRST. You can start new work at ANY age and be wildly successful. You can persevere above any physical limitation, and not just survive, but THRIVE and use that limitation to your advantage! We LOVE Alma Thomas!

IMG_4967.JPG
IMG_4964.JPG
IMG_4961 7.JPG
IMG_5029.jpeg

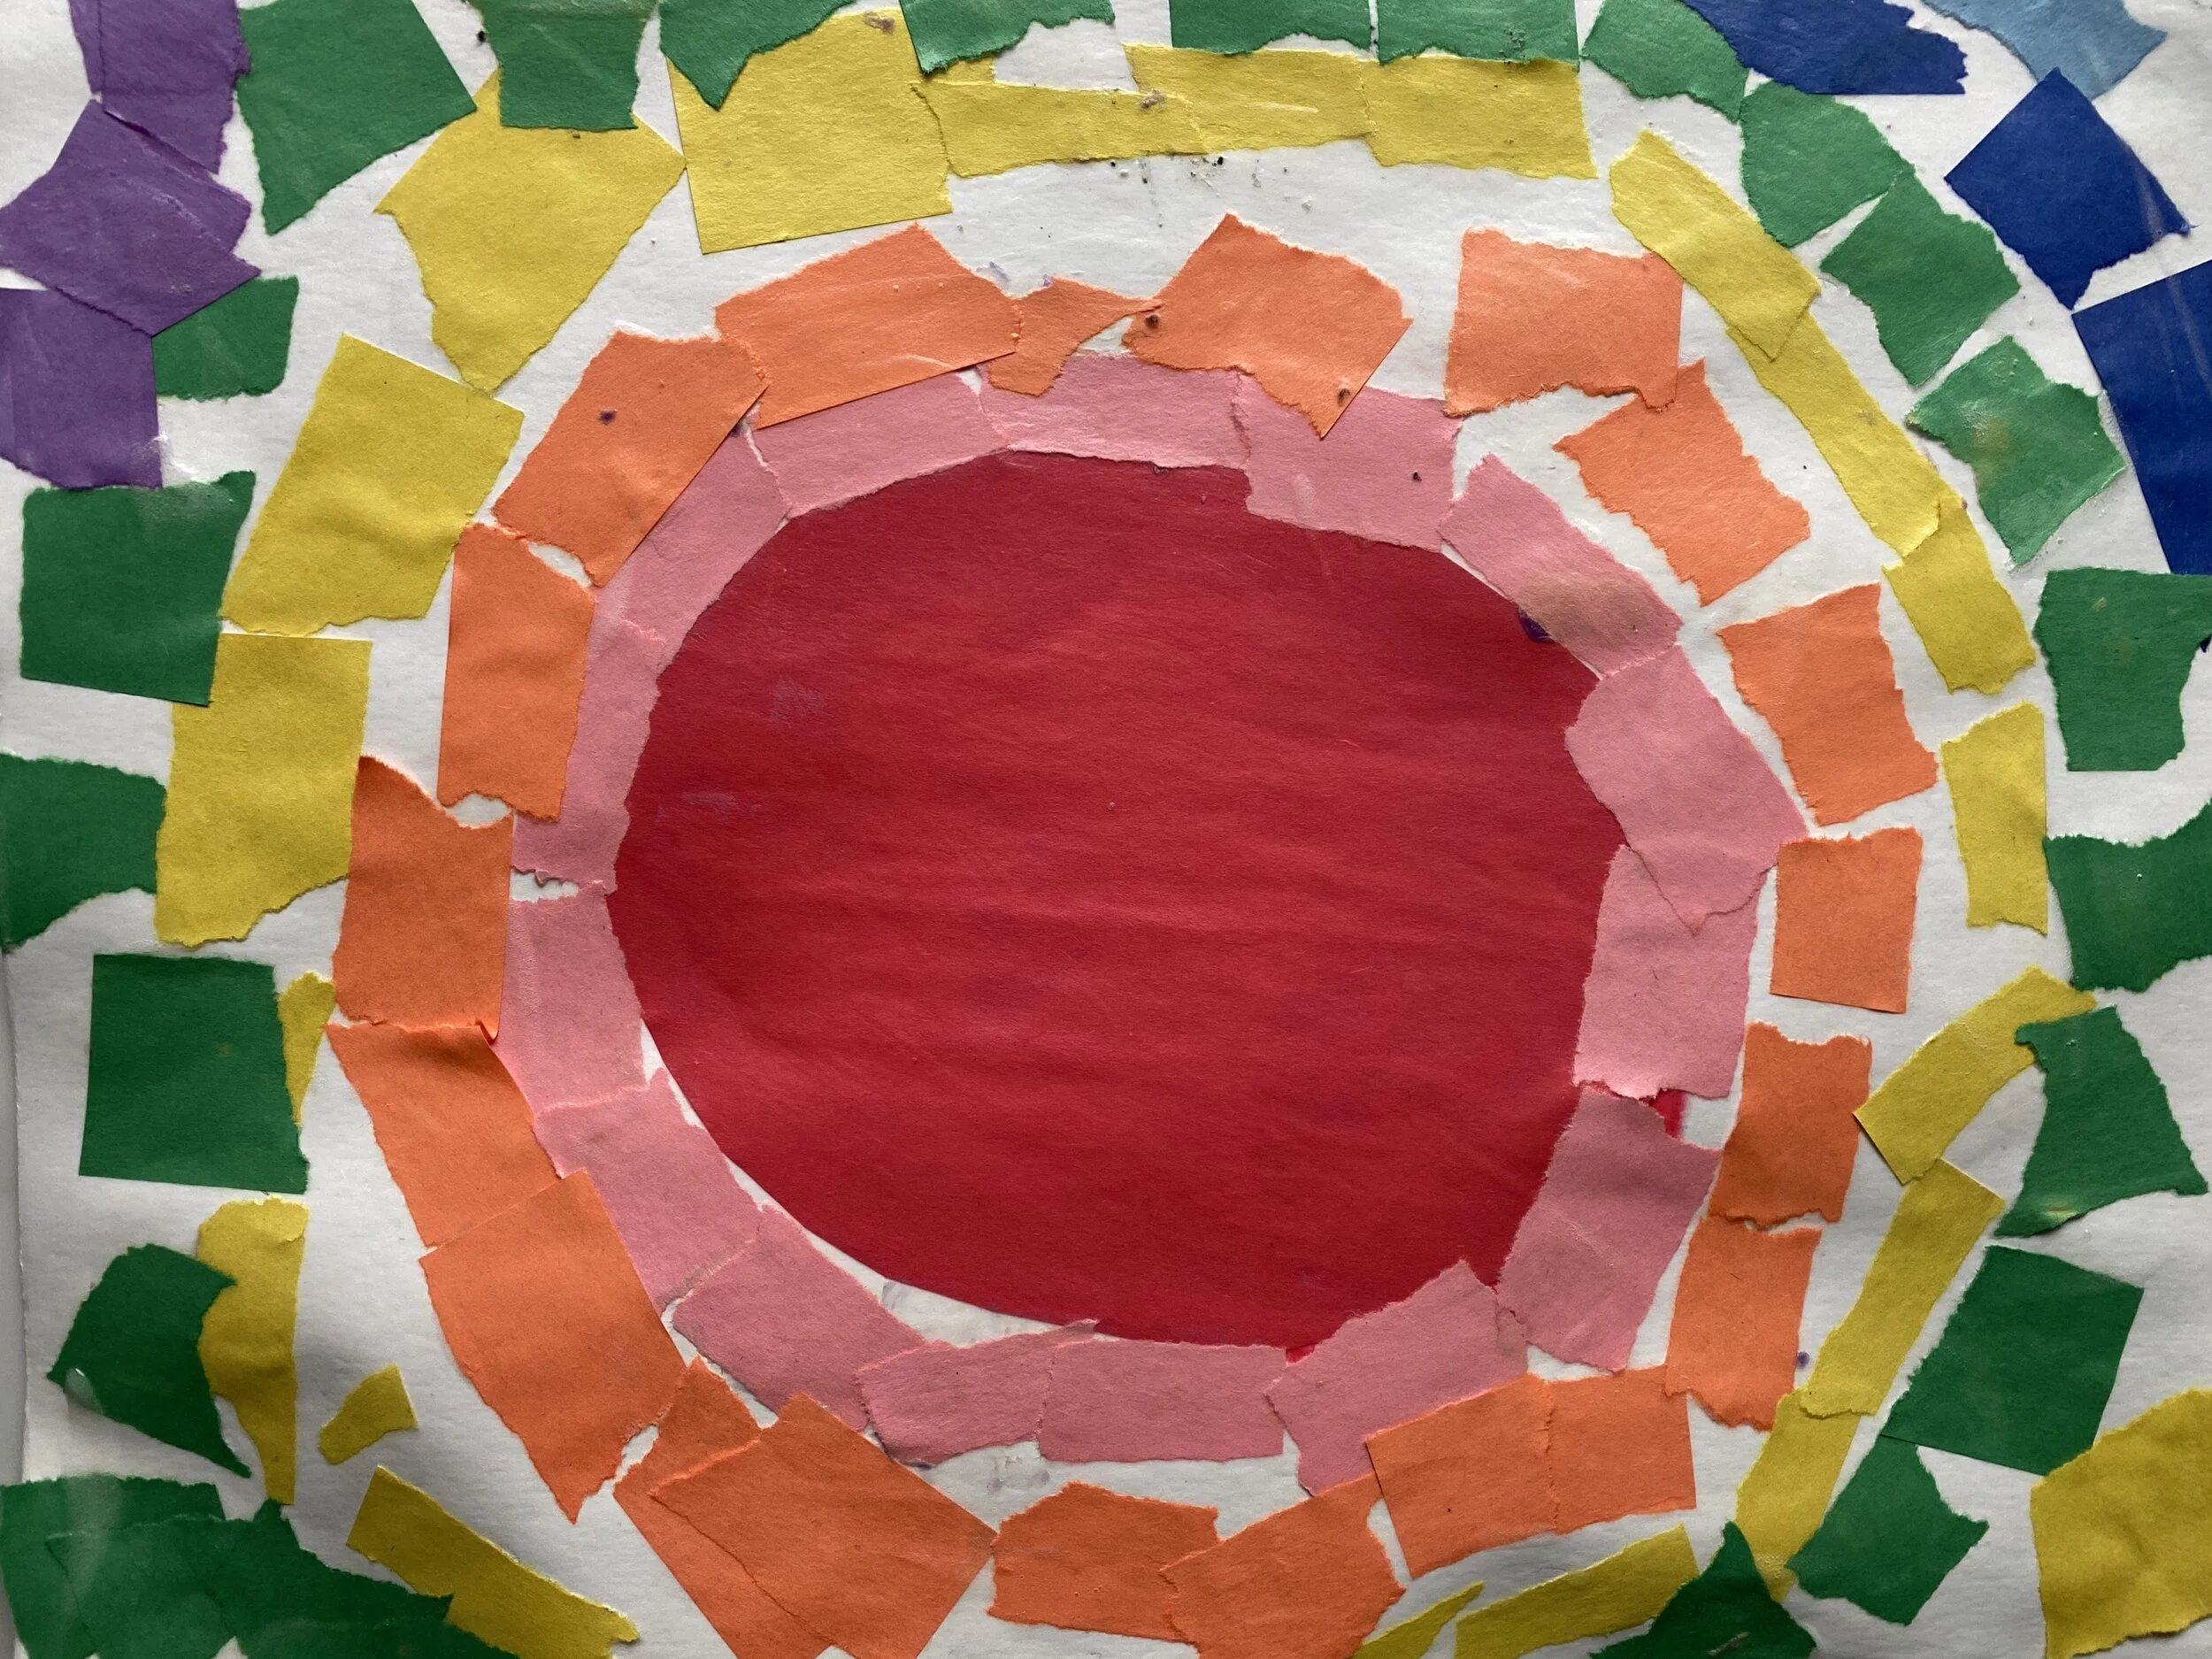
Our ‘Eclipse’ by Alma Thomas inspired work ties in all of our themes for the week! Trying something new and forging ahead (Alma was the first to graduate!), circles and squares (geometry/math!), the letter A (for Alma!), primary/secondary colors in the color wheel (art and science!) while also working on fine motor skills (gluing and following a pattern), and of course… having a great time.

Free Play

4:30-5:15

When our students finish their artwork, we cleanup and set up our free play stations! I love this picture of the kids completely engrossed in their own imaginary worlds of dinosaurs, rainbows, and farm animals

IMG_4973.JPG

This week really could not have gone any better, and I am excited for next week, when we build upon our new-found knowledge of water to learn about hygiene… because we’re going to learn about micro-organisms like Viruses, Bacteria, and Fungi!

a NE portland in-home preschool - sample day schedule

we still have a few spots open in our pandemic preschool 😉 

if you’re not local, don’t worry! we are going to be sharing SO MUCH of our homeschool resources and curriculum with everyone here, as well as on our Instagram account https://www.instagram.com/houseoflf/

daychoreography.jpg


about our days:

Upon arrival and after temp checks and hand washing, we will start with yoga circle time  and pre-reading/writing skills, while the big boys (my sons: Tavish age 12, and Pierson age 10) go to their independent learning stations in our study room. In the above day choreography (because lets be real, it’s all more of a dance than a schedule, am i right?) you can see that preschool has one schedule (on the left) the boys have their own schedule for independent learning (on the right), but we come together for some multi-age learning which is designated in italics in the middle. I love mixed-age learning environments, because it gives everyone a chance to be a mentor or a mentee, teaches patience and empathy, develops responsibility in the older groups, and gives the younger groups something to aspire to.

Pre-reading Pre-writing

our goal for this year is to get all preschoolers to recognize, write, and sound out letters, and develop reading skills. We are utilizing the entire set of BOB books for reading, and teaching writing skills through art and sensory play. Our books/play for preschool will be ‘themed’ based each week, some examples include: the universe, emotions/mental health, our community, countries around the world, women in history, etc. They will be inclusive, educational, thought-provoking, and tie into the ‘subjects’ (like math and pre-reading/writing skills) that we are learning through play. 


17_house 2020.jpg

Math

In our math time-block I will create different  invitations to play at our table stations that elicit natural math concepts and discussion within it's play (think tannegrams for geometry, fractions with measuring cups, counting toys up to 50 or more, recognizing and naming 2-d and 3-d shapes/structures). There will likely be some traditional options (adding and subtracting in written format) but the overwhelming majority of our math will be multiple options for child-led, play-based learning, so each child can learn at their own speed, in their own preferred way. I want to keep math fun, exciting, and rewarding, and this section of our day will largely be child-led and inspired by their own curiosity and interest.

26_house 2020.jpg
22_house 2020.jpg

responsibility and stewardship through environment care

In our transition to outdoor play, we'll start by caring for our environment to help teach responsibility and stewardship in our community (sweeping the playhouse, gathering eggs and feeding the chickens, harvesting from the garden, feeding the fish). when children feel a sense of ownership in their spaces, they also feel a responsibility to care for it- fostering empathy. This empathy and responsibility can be carried over into their emotional and social lives.

NE portland preschool
87_house 2020.jpg
NE portland preschool
81_house 2020.jpg
NE portland preschool

outdoor child-led free play

but then it's time for child-led free-play in our backyard with multiple environments: a two story playhouse, water/painting station, sandbox (sanitary, covered, and well protected from neighborhood cats), swings, open lawn, etc. these environments have been designed with STEAM in mind, sensory exploration,  and the ability to rock, spin, swing, and bounce - which stimulates the vestibular system in young children and is very important for brain development. 

I will encourage each child to have rainboots and a Tuffo (or similar) full body rain suit so that they may play and get messy uninhibited, and can remain warm and dry when we come back inside. we will be playing outside rain or shine!

I will encourage each child to have rainboots and a Tuffo (or similar) full body rain suit so that they may play and get messy uninhibited, and can remain warm and dry when we come back inside. we will be playing outside rain or shine!


47_house 2020.jpg
NE portland covid-safe preschool
50_house 2020.jpg
NE portland covid-safe preschool


LUNCH, QUIETTIME: We'll come in for lunch all together, (packed by parents) and then we'll transition our big energy to quieter energy with story time and quiettime/meditation/naptime.  each child will have their own space to lay down with a weighted blanket, an eye mask to cover eyes (if they choose), and a quiet meditation will play that is geared for young children. children may choose to fall asleep, or stay awake and have quiet introvert time to regroup after such hard play.


FRENCH IMMERSION: we'll get our brains working again with french immersion (through one-third stories and a short 15 minute french immersion muzzy program), and mentorship from the big kids who are both fluent in french. 

SCIENCE: Then we get to see what the big kids have created with their biology/physics/chemistry science experiments! we have purchased NOEO science for our elementary and middle school boys, which include many real science experiments with actual equipment. This is a great opportunity for the big kids to help mentor little ones, and ‘teach back’ what they have learned about their experiment to the littles. Our preschoolers will learn about the scientific method and make their own hypothesis and conclusions.


7_house 2020-2.jpg

DANCE/MUSIC: we'll get our bodies moving again with dance and music (ballet/tap/jazz for dance, and percussion/piano/singing for music). This is one of the things I am so passionate about, and so excited to share with our little ones! we are converting our living room into a movement space (photos to come!) complete with mirrors and barre for ballet.


ART:  after all that fun, we will enjoy a snack and learn real art technique (with inclusive art history sprinkled in, focusing on artists outside the traditional dead white guys we all know about ). While crafting and free art expression are always available to the kids at any moment of the day, this is an actual age-appropriate art class that teaches children how to see and express their world in visual form. we will learn about the elements of art (line, shape, pattern, texture, color, form) and how to use these elements and techniques to express their innate desire to communicate visually.

We will end our day with free-play at our reggio-inspired play stations, while parents pick up.

NE portland preschool

Philosophies:

We love mixing reggio, montessori, and traditional styles of learning for young children. Our days will have a strong emphasis on art (dance, music, art) but will always be flexible and largely child-led. I love ‘the whole brain child’ method of empathy, respect, and autonomy for dealing with emotional challenges in preschoolers. Our education is secular, but respects other belief systems, inclusive, and we believe black lives matter, science is real, love is love, and all the rest. 


My background: 

I have a degree in Fine Art from the University of Wisconsin, and am a working artist and photographer (@lexiafrankphoto ) I was also a member of the Madison Ballet, as well as the University of Wisconsin Dance Team, and a current member of @freshvibe dance crew , (although not rehearsing during the pandemic). I have over a decade of experience as a dance educator for all ages, 3-adult, and miss teaching my students very much! I am thrilled to do it in our home, and really excited to provide dance and art education for these kiddos. (really… i am SO EXCITED for dance class in my living room, and art messes in the playroom!) 

I have a clear background check, and just genuinely love my kids and their friends like they are my own children. 

NE portland preschool
241_house 2020.jpg


Times/days:

Ideally we would do tues/wed/thurs 8:30-5:30, but am open to part time needs, or monday-friday schedules for working parents. 


Covid risk:

my husband and myself are both at home full time. Rarely, he may be required to travel for his job, but he is always careful and does so with caution (he has had to travel outside the home 2x in the last 7 months), but he will be in our upstairs working while school is happening on the main floor. our children each have a friend they play with- outside only or inside with masks- on our street. 

we have the top-of-the-line air purifier running inside, that traps and kills viruses like Covid-19. research has also shown that higher humidity levels can reduce transmission of the disease, so we have a humidifier running on each level of our home. our home is cleaned professionally, and sanitized with Force of Nature- a safe and extremely powerful disinfectant that is not available in stores. we will create fresh air opportunities whenever possible, and have multiple hand-washing and environment sanitizing times scheduled throughout the day. We ask that any preschool family follows the state guidelines, (ie: wears masks in public places, does not attend large gatherings, etc) and  essentially just tries their best to prevent the spread and contraction of covid-19. Our daughter is in a higher-risk category for developing complications to covid 19 (respiratory condition), so we are hoping this preschool will be a lower-risk activity for her (rather than attending a large preschool) while also supplying quality education and socialization opportunities for her and her preschool friends! That said… we want to create a sense of normalcy for these young children, one without fear, and the ability to be mask free in this ‘safe zone’ of our house bubble. While we will be practicing good hygiene, i will not ask them to wear masks, and instead ask students to stay home if they have a cough or runny nose. If your child is experiencing a fever, I will ask they stay home until a negative covid test, following state guidelines. We will do fever checks and hand washing at the start of each day before coming inside to start school. 


How did we decide to do this?

During the pandemic i’ve watched my gregarious, extroverted, preschool daughter suffer without friends and social support that she used to receive at her gymnastics preschool. As she is higher-risk, I was unwilling to re-enroll her at a traditional preschool that has multiple children. By keeping her at home with max 3 other children, I hope to keep our bubble small and safe, while still providing quality education and social opportunities for all involved. 

We are asking a small tuition, to help provide wonderful opportunities for the kids enrolled, as well as offset the loss of my income as a destination wedding photographer. I am looking at this year as a once-in-a-lifetime opportunity to be the mom i’ve always wanted to be (but was too busy working), a chance to share my unique skills in art, dance, and early childhood education with others, and to slow down the rat race and enjoy childhood wonder. 


How to contact me for info on tuition and availability:

shoot me an email at lexia@lexiafrank.com and tell me a little about yourself and your child(ren)!

More photos:

follow along on our personal instagram for more on our space and to get a sense of who we are!


How to Expose the Beams on your Ceiling, DIY

When my husband and I bought our house as newbie homeowners, we decided to make a little tiny change the day we moved in …. we thought we’d just take down the ceiling quick, to expose the beams, before we moved our stuff in. we thought it might be a little messy, so better to do it quickly before.

213_house 2020.jpg

I love the look exposed beams give a space. the lines provide a visual illusion of more space and height for small spaces, which is huge (literally) for us because our entire home is just over 1,000 square feet, and there are 5 people living here.

191_house 2020.jpg
6_house 2020-2.jpg

we talked to contractors, and no one wanted to take on this project for a litany of reasons, but i was undeterred. We decided that we were going to expose our beams come hell or high water, and even though we had exactly zero experience in home renovation, we were going to take it on ourselves.

34_house 2020.jpg
18_house 2020.jpg
4_house 2020-2.jpg
2_house 2020.jpg
1_house 2020-5.jpg
25_house 2020.jpg


here’s how it really went, in case you wanted to attempt this project yourself.

TL:DR- i don’t regret it whatsoever. it is my favorite thing about my house, i’m shocked more people don’t do it. it was harder than expected, took longer than expected, and there are a few things to make sure you do if you’re going to go this route.


When we purchased our home, the ceilings were really low. i had a sneaking suspicion that above that very low ceiling was the original ceiling- and that some time in the 70s they had installed a faux ceiling that was lower to maintain better heat in the winter. the ceiling height just didn’t make a lot of sense architecturally, and i knew there was extra square footage being hidden!

the before- house25-3.jpg

Even if there wasn’t extra square footage there, i still wanted to expose the beams because i love the look and even that 6 inches in between the beams of additional height would be welcome.

we were told by every contractor that we couldn’t/shouldn’t expose the beams. the reasons given were as follows: it wasn’t meant to be like that originally, and wasn’t intended by the architect, so it shouldn’t be done. it will look bad. support beams and subfloor aren’t ‘pretty’ and won’t look polished. it will hurt the resale value of your home because it isn’t the norm. people just don’t do it. when people walk around upstairs it will drop dust on those sitting downstairs. you will loose the sound insulation between floors by taking out the sheetrock ceiling, and it will be super loud. it will be too hard to drywall between the beams. you’ll see the wiring and plumbing for the upstairs if you expose the ceiling. we just don’t want to do it.

I found counter points to every single one of the concerns listed above (which you’ll discover below), and because we couldn’t find a contractor willing to do it for us, we set to work on this project ourselves.


1) Tear down the existing ceiling

okay, here is what you need to know if you want to do this yourself: our project snowballed into a full gut for a few reasons, but yours may be MUCH easier. if your beams are right above your ceiling (99.9% of cases)- you have a much simpler project ahead of you. take down the ceiling, put up a little bit of drywall between your beams, and you’re good to go.

In our case, the ceiling we took down was a ‘faux’ ceiling that had been installed in the 70s., so we would also need to take down the original ceiling, and address the ‘wall situation’ between the lower ceiling, and the actual ceiling/beams. we decided the best thing to do in our particular situation was to just take down all the drywall in every room because our electrical and plumbing really needed to be replaced, and then we could add insulation at the same time.

If you want to read about the hilarity of this spur-of-the-moment full house gut, go read this post.

so our project snowballed into electrical, plumbing, insulation, and thennnnn walls and ceiling. but your project will likely avoid all that chaos, and just involve your ceiling.


you can see the original ceiling above this dropped ceiling in this photo. two for the price of one!

you can see the original ceiling above this dropped ceiling in this photo. two for the price of one!

You can see the dilemma- we needed to now address the walls as well as the ceiling. but, look at all that additional space! and we hadn’t even exposed the beams yet!

You can see the dilemma- we needed to now address the walls as well as the ceiling. but, look at all that additional space! and we hadn’t even exposed the beams yet!

beams and upstairs subfloor are now exposed, but we have the wall situation to contend with…

beams and upstairs subfloor are now exposed, but we have the wall situation to contend with…

the realities of how much debris there was.

the realities of how much debris there was.

you’re going to need more than a trash can.

you’re going to need more than a trash can.

soooo it all just came out. we had to commit. hopefully, your exposed beams experience will be different.

soooo it all just came out. we had to commit. hopefully, your exposed beams experience will be different.

2) hire an electrician to deal with the wires

because you can’t have bare wires exposed in your ceiling, they will need to wire any fixtures through some conduit. We don’t have any plumbing in our ceiling because we don’t have an upstairs bathroom, so we didn’t have to worry about hiding pipes. if you’re anything like us, you will receive some push-back “but you’re going to see the conduit! but people just don’t DO this. but… this isn’t….usual.” just nod, smile, and continue forth. it’s going to be absolutely fine.

3) Drywall between the beams

drywalling between the beams was a real beast- you need to cut each piece of drywall to fit in between those beams like a puzzle. TLDR: i would not suggest doing this part yourself, and searching (convincing) a drywall company to take it on.

when you are putting up a wall, you screw in a board (called drywall) onto the wood frame of the house. to cover the seams of these boards meeting, you spread some drywall mud (kind of like cake icing) in the seams, and tape it up. when the mud dries, you give it a sand, and repeat the process 5 times to create a perfect seamless surface. (you can watch videos of how to drywall on youtube… which is exactly where i learned) when you have more seams, there is more mudding/sanding. and since we were fitting drywall into the space between each beam there were LOADS OF SEAMS that needed to be mudded/sanded.

once the mudding/sanding was complete, we could paint the walls, which seals the mud and keeps everything in place and looking nice. would i do this project myself again? NEVER. it took us months. it may have taken years (literally). I don’t actually remember because I try to block this part of the renovation out of my mind because inconveniently, I also have a texture sensory issue with sand/dust/chalk (along with misophonia, which is also triggered by the sound of sanding). The fact I was literally sanding chalky substances every day for months on end had a real effect on my mental health (panic attacks, anxiety, and depression). The fact that this particular drywalling project was 100,000% harder than a normal drywalling project because of all the puzzle pieces in between beams made it so much worse and took so much longer.

If you want to expose your beams, hire someone to drywall. full stop. the rest you can conceivably and reasonably do yourself.

drywall is up on the main wall, but we have not yet put in the drywall between the beams. this is important to do to get that exposed beam look- otherwise it just looks unfinished and weird.

drywall is up on the main wall, but we have not yet put in the drywall between the beams. this is important to do to get that exposed beam look- otherwise it just looks unfinished and weird.

drywall being put between the beams, and one round of mud/tape on the wall.

drywall being put between the beams, and one round of mud/tape on the wall.

after one round of sanding the dried mud. that white stuff on the floor is all drywall dust. it’s actually a dark wood floor. MY MIND IS CRINGING RIGHT NOW FROM PTSD.

after one round of sanding the dried mud. that white stuff on the floor is all drywall dust. it’s actually a dark wood floor. MY MIND IS CRINGING RIGHT NOW FROM PTSD.

did i mention that we actually lived here through all of this? with two children and two dogs? i forgot to mention that part? good times. good times.

did i mention that we actually lived here through all of this? with two children and two dogs? i forgot to mention that part? good times. good times.

I also learned that drywall dust really damages your hair. it sucks all the natural oils out like a chalk. my hair was in the worst condition of my life during these months of drywalling, and i wish i would have worn a hat. once i realized what was …

I also learned that drywall dust really damages your hair. it sucks all the natural oils out like a chalk. my hair was in the worst condition of my life during these months of drywalling, and i wish i would have worn a hat. once i realized what was damaging my hair it was pretty much too late.

2) Clean up/Sand the beams

Your beams are likely going to be covered in cobwebs, a hundred years of dust and grime, and thousands upon thousands of nails. you’ll need to pull every nail out manually with the back teeth of a hammer, and sand off the grime. I have a friend who exposed her beams during a full house gut like ours and they sand blasted the beams to clean them up but she says she wouldn’t do that method again because the mess was so intense it stopped other renovation on their home for weeks. We sanded ours by hand, which is what I would suggest you do too.

We rented scaffolding, got 4 power sanders (one for each hand for my husband and myself), stood on the scaffolding and just started doing one beam at a time- 4 sanders going. Once we’d finish that beam, we’d pull ourselves to the next beam (scaffolding is on wheels) and sand that one. It was actually a very efficient process with both of us working at the same time with 4 sanders.

yes, it really is needed. 100 year old beams were never meant to be seen, so they are absolutely nasty. perhaps newer construction wouldn’t need to sand the beams, but plan on it being 100% necessary anyway, and then maybe you’ll be pleasantly surprised if your home is newer.

now is the time to consider oiling or staining your beams. we tried a few tests of linseed oil, as well as stain, but ultimately decided we loved the bare sanded wood best. which was great, because this was the only time in history of DIY projects we made things easier on ourselves.

this is the best-looking area of the ceiling. other parts are in significantly worse shape. I am undeterred.

this is the best-looking area of the ceiling. other parts are in significantly worse shape. I am undeterred.

old nob and tube wiring and random bits of scrap wood randomly nailed into beams. all of this needed to be taken out and cleaned up.

old nob and tube wiring and random bits of scrap wood randomly nailed into beams. all of this needed to be taken out and cleaned up.

do not be dismayed if it looks nasty. all of this can be easily cleaned up and sanded out. it will be okay!

do not be dismayed if it looks nasty. all of this can be easily cleaned up and sanded out. it will be okay!

Dustin taking out random pieces of wood nailed into the beams. every single one of those holes on the bottom of the beams had a nail in it, which were all pulled out manually. this is typical of a 100 year old home with lath and plaster ceilings- bu…

Dustin taking out random pieces of wood nailed into the beams. every single one of those holes on the bottom of the beams had a nail in it, which were all pulled out manually. this is typical of a 100 year old home with lath and plaster ceilings- but your reno will likely be A THOUSAND TIMES less messy and less nails if you have a more modern drywall ceiling. our situation is worst case scenario, and we still did it all by hand.

3) paint your ceiling

We had considered leaving the entire ceiling wood, but with our dark floors and tiny square footage, it was just too dark (especially in our pacific northwest winters). We had also considered painting the entire ceiling white, but then you loose some of the visual aesthetic of those lines that I love so much.

Obviously, I chose the hardest option- which was to paint in between the beams, and leave the beams their natural wood color. This would give me the greatest visual sense of height, brighten up the space, and leave a little bit of history with keeping our 100 year old beams in their natural state.

Again using the scaffolding on wheels, we individually taped each and every beam with plastic and painters tape. this was quite the process, but with both of us working together it took 1 weekend.

we rented a paint sprayer from home depot, and primed/painted the ceiling. this took just a few hours, but was so much fun, i wish it would have taken longer. We rented our paint sprayer, but we honestly should have just invested in our own, because since then there have been SO many times we needed to use a paint sprayer (cabinet painting, playhouse painting, basement painting, etc). below is the one i would buy now, based on extensive reviews and research.

BUT THIS IS IMPORTANT!!!! you need to use this specific shellac primer to prime bare wood so the wood tannins don’t show through. if you don’t know what i mean, google ‘wood tannins showing through white paint’. if you don’t want to paint your ceiling white (and want it a darker color) this likely won’t be an issue. but if you want it white like mine, you don’t want the oils and tannins in wood turning your beautiful white paint yellow. this is the paint to use , and don’t let anyone at home depot try to mansplain to you that you can use any other brand.

you can’t. ask me how i know.


This is the only paint I’ve ever found that effectively blocks wood tannins from showing through white paint, and I have tried every.other.brand.

spray the Zinsser BIN primer on, then spray your final top coat (mine is Falling Snow by Sherwin Williams).

Always remember to remove painters tape after the paint has dried, but before the paint has fully cured (so, within 24 hours). if you wait until the paint has fully cured you’ll end up pulling off chunks of paint because the paint has sealed permanently to the painters tape.

we cut a plastic drop cloth into long strips, and then worked together to tape it into place for each.and.every.beam.

we cut a plastic drop cloth into long strips, and then worked together to tape it into place for each.and.every.beam.

extremely time consuming- extremely worth it.

extremely time consuming- extremely worth it.

you can see the scaffolding we rented here- we’d stand on it to sand the beams, then use the ceiling to pull ourselves along to the next beam.

you can see the scaffolding we rented here- we’d stand on it to sand the beams, then use the ceiling to pull ourselves along to the next beam.

my favorite day of renovation ever- nothing will ever top this moment. after months and months of work to get to this point- i was finally doing the last step to our exposed beam project- the entire reason we started renovating in the first place! p…

my favorite day of renovation ever- nothing will ever top this moment. after months and months of work to get to this point- i was finally doing the last step to our exposed beam project- the entire reason we started renovating in the first place! plus, paint guns are THE BEST INVENTION EVER. so much fun. remembe- zinger BIN primer first, then paint.


4) Address the Upstairs Floor Considerations

After you paint, you could theoretically be done. but there are some downsides to having exposed beams. you are essentially exposing not just the beams, but also the upstairs subfloor. this means that you are eliminating that natural sound insulation that a normal sheetrock ceiling provides. Therefore it can be noisy when people walk around upstairs and you are downstairs. I had also read online that when people walk upstairs it can create a little dust falling down from the floor boards rubbing together. I was not interested in having dust fall down onto my head while my children romped around upstairs, so we decided to take some preventative measures.

Because we were already replacing the flooring upstairs, we did an additional steps. After we pulled up the carpet, i discovered floors in terrible condition. i wouldn’t even call them ‘floors’. this ‘upstairs’ was actually just an attic originally, so i don’t think the floors were ever really meant to be floors in the traditional sense. We added a layer of plywood to create a level surface, then added a thick layer of sound insulation underlayment to the floor upstairs underneath the wood flooring. if you were looking at our floor like a lasagne it would be: Support beams, subfloor (this is what you see downstairs in the ceiling) then plywood, then sound proofing insulation, then finally the real wood flooring we installed new, and then paint (yes, we painted our wood floor white upstairs… with three kids. we still love it 7 years later). the sound proofing provides sound insulation so we don’t hear every single thing that is going on upstairs, but it also provides cushioning so when kids are bouncing around upstairs on the wood floor, it cushions the impact so the subfloor (aka downstairs ceiling) doesn’t move around and drop dust on those people sitting downstairs.

this is what i found after pulling up our carpet upstairs

this is what i found after pulling up our carpet upstairs

and in some cases, the flooring wasn’t even real flooring…

and in some cases, the flooring wasn’t even real flooring…

putting down a layer of plywood to cover the subfloor/nasty carpet adhesive to give a level surface. Then we put down the soundproofing underlayment. THEN we put down our wood flooring. plenty of sound insulation now.

putting down a layer of plywood to cover the subfloor/nasty carpet adhesive to give a level surface. Then we put down the soundproofing underlayment. THEN we put down our wood flooring. plenty of sound insulation now.

but not before i found this magnetic word. and yes, our house was haunted, which i will have to write a separate post about. it lasted only for a few months, and i tried to explain the haunting in ANY scientific way i could, and came up short. i nev…

but not before i found this magnetic word. and yes, our house was haunted, which i will have to write a separate post about. it lasted only for a few months, and i tried to explain the haunting in ANY scientific way i could, and came up short. i never believed in ghosts until i experienced a haunting myself. I’ll have to write a separate post about what we experienced (it wasn’t bad, nor particularly scary. but definitely unsettling)

our finished white floors in the upstairs now

our finished white floors in the upstairs now

PS- you can make this super easy, ultra-beginner level window seat at this link: http://www.lexiafrank.com/house-of-lf/2020/9/5/an-easy-diy-alcove-window-bench

PS- you can make this super easy, ultra-beginner level window seat at this link: http://www.lexiafrank.com/house-of-lf/2020/9/5/an-easy-diy-alcove-window-bench

In summary- i would absolutely do this project again. i would outsource the drywalling to a contractor, but otherwise, it is a no-brainer for me. it was messy, it was long and awful, but mostly because we were doing the work all ourselves. the payoff has been immense, i love the look, and because i live and work at home, it’s really nice to have a space that i love both visually and functionally.


Would you ever attempt this in your own home?

if you’re doing it right now, tag me on instagram so i can see your progress, and follow along on our current renovation projects on our 1907 portland bungalow over at H O U S E OF L F

This post may contain affiliate links, that when you click on and purchase a product, I may earn a small commission, but it costs you nothing extra. it does help support me and allow me to continue to share these resources and experiences with you! thank you for buying through the above links!


an easy DIY alcove window bench

This post may contain affiliate links, meaning I earn a commission if you purchase through clicking on a link, at no additional cost to you. It helps me continue to share my resources with you!

image description for accessibility: bright white and light filled window seat in an attic alcove, white walls and floor, straw hats hanging on the wall, hand hammered lantern hanging from ceiling, and wooden blanket ladder leaning against the wall.

image description for accessibility: bright white and light filled window seat in an attic alcove, white walls and floor, straw hats hanging on the wall, hand hammered lantern hanging from ceiling, and wooden blanket ladder leaning against the wall.

You have a window! you want a window seat! You have zero woodworking skills. You don’t even know where to start. You think a pilot hole has something to do with the airline industry.

I’ve got you- you’re in the right place. This is the world’s easiest woodworking project, and you basically can’t mess it up. It’s a perfect first project for your house.


First up, you’ll need to gather your materials.

For this bench we used just 1 sheet of plywood. now, i’m not going to go into dimensions and measuring… because i know your alcove is going to be a different size than mine! we used another sheet to make the storage boxes underneath, but this tutorial will just be for the bench. This way, you can choose whatever kind of storage option you’d like under your bench- be it baskets, bins, or whatever you’d like!

You’ll need just four basic ingredients:

if you don’t already have tools, you’ll need these to get you through this project:


If you don’t want to invest in the table saw, you can get away with a circular saw for this project as well. You can also see if you have a Tool Library in your neighborhood where you can borrow tools just like you borrow books!

Of course, you’ll need a little bit of primer and then paint in your preferred choice of colors, and some cushions!

We got ours from wayfair, and are hands down, the softest, cushiest cushions i’ve ever sat on in my life. They are EXTRA ya’ll. They are the Caroline Okun Moorish moroccan square pillow cover and insert if you want some of your own. this is not an ad- i just love them.

They are so good, that we actually based our window seat depth off their depth (23” square) so everything would be comfy cozy. When we placed them in, my husband actually said “umm… are these TOO cushion-y?” the answer is no. One can never have too cushion-y cushions.

STEP 1: prep your space.

We filled nail holes with sandable wood filler, gave the walls a fresh coat of paint, and primed our super old, aluminum windows. I’d love to switch them out to something more energy efficient, but that project is slated for later. In the meantime-I wanted to give them a little update, so I spray painted them with primer, and then black.

image description for accessibility: white attic window alcove with nail holes filled before getting a coat of paint.

image description for accessibility: white attic window alcove with nail holes filled before getting a coat of paint.

STEP 2: bench board

Measure your space, and cut your top board to fit. Our house is old, and not square, and you can see the gaps in corners. No problem! If you’re painting your space, you can use a little bit of caulk to fill in those gaps before you paint your window bench. Ensure your bench is level with your… level.

Image description for accessibility: detail photo of the window and top bench of window seat.

Image description for accessibility: detail photo of the window and top bench of window seat.

STEP 3: side leg supports

Support your top board, with two side leg boards. Screw these side boards into the wall (ideally into studs, which you can locate on your wall with your stud finder), and then screw the top bench board into them for extra stability, screwing from the top of your bench down into the leg. Remember to drill a pilot hole in your board before you drill in a screw. This will prevent your board from splitting. If you’re unsure what a pilot hole is, do a quick youtube search!

If you live in an old house like we do, don’t gauge your ‘levelness’ off of existing structures like windows or floors. If you look carefully, you can see that there is a gap between our window frame and our bench- because our window is not actually level. But our bench will be! This also means that our side supports are not the exact same size as one another. we measured for true level, not house-level. When we sit on our bench, we don’t want to feel like we are tipping to one side or another. you can disguise any weird gaps with caulk, and cushions.

smoke and mirrors baby!

image description for accessibility: detail of the window with bench seat below it, with side leg supports installed. tools scattered around floor.

image description for accessibility: detail of the window with bench seat below it, with side leg supports installed. tools scattered around floor.

STEP 4: leg supports

measure and add in your leg supports! Secure them by screwing from the top of the bench board, through the center of each leg, just like you did on the side supports. Remember, it’s important to drill pilot holes, because your support legs are pretty skinny, and can easily split. in the photo below, you can see an example of where we screwed in (the little black dot to the left of the windex) if you zoom in and look closely.

Again, make sure you measure each leg individually. Don’t assume they are going to be the same size if you live in an old and un-level house like ours!

image description for accessibility: window with bench, side support legs, and middle support legs installed, and trim on the bench.

image description for accessibility: window with bench, side support legs, and middle support legs installed, and trim on the bench.

STEP 5: finishing details

Measure and add in your trim! You can use a hammer and your finishing nails (little itty bitty nails that are almost imperceptible when painted). Your trim will cover up the rough edge of the plywood. It’s handy to have your trim on the bench board extend upwards to create a lip that will help keep your cushions in place so they don’t slide off.

Paint and you are DONE!

We continued on and made custom boxes to fit our space! but you can also just buy baskets or boxes that work for you!

We made a shelf above our window with the scraps. You’ll notice our L brackets that support the shelf are upside down and on the top of the shelf. This is my trick for creating a cheater floating shelf! the L brackets are disguised with books and decor, so you’ll never see them!

image description for accessibility: little girl lays on the window seat with one storage box underneath. white wall has been painted blue.

image description for accessibility: little girl lays on the window seat with one storage box underneath. white wall has been painted blue.

I had experimented with painting an ombre wall, but decided I didn’t love it, and painted it back to white. We finished our boxes, caulked the gaps, and gave everything one last coat of paint.

image description for accessibility: window seat fully installed with storage boxes underneath, and final coat of white paint going on.

image description for accessibility: window seat fully installed with storage boxes underneath, and final coat of white paint going on.

Get your preferred storage units under your bench, and decorate! See how I hid those shelf brackets with decor? So tricky! Our blanket ladder was a purchase a few years ago from World Market, and our bed tray is from target.

We keep our extra linens and blankets in this area, and it is so handy to have it hidden away in an aesthetic manner.

image description for accessibility: side angle photo of the window seat in the attic alcove, complete with cushions, a shelf with books and candles and clocks above the window, a wooden ladder with blanket draped over, white walls filled with light.

image description for accessibility: side angle photo of the window seat in the attic alcove, complete with cushions, a shelf with books and candles and clocks above the window, a wooden ladder with blanket draped over, white walls filled with light.

I really hope this ultra-easy 5 step window bench inspires you to create your own little reading nook. This is the perfect ultra-beginner woodworking project for someone who has never even held a drill before.

Get the look here:


Tag me at @HouseofLF if you attempt this project! I would love to re-post your work! Follow along below for more easy house projects!